Coralife LED BioCube Reef Aquarium Setup Guide
w/ Info on Maintenance, Upgrades & Common Problems
You might also check out our How To Set Up a BioCube Aquarium Video on YouTube*.
*NOTE: You might want to also watch the
How To Cycle A BioCube Aquarium & Adding Livestock to a BioCube Aquarium videos we created and posted on YouTube. They cover sections 2. Cycling The Aquarium & 3. Adding Livestock.
NOTE: We also have a Coralife LED BioCube FRESHWATER Aquarium Setup Guide.
1. Getting Started
For accompaniment to this article, view the How To Set Up A BioCube Aquarium Video
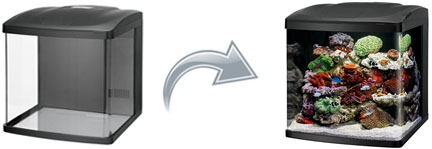
You just received your new
Coralife LED BioCube Size 32 or Size 16 Aquarium. Now what? Setting up your BioCube is actually a simple process if youre patient and follow these five steps.
NOTE: As the BioCube is primarily designed as a reef aquarium this guide assumes youre setting up a reef tank.
|
 Step #1 Position Your BioCube
Where should you put your BioCube? It should be placed close to an electrical outlet and out of direct sunlight. Use either a GFCI outlet or power strip with a built in GFCI. Place your BioCube on a flat, level surface that can support its full weight. Do not underestimate how much a full BioCube can weigh. The BioCube Size 32 is easily over 300 pounds when full.
You can use the Coralife BioCube Size 16 Aquarium Stand or Coralife BioCube Size 32 New & Improved Aquarium Stand. These Stands are designed specifically for BioCubes. We've posted the How To Build a BioCube 32 Stand Video on YouTube to help with assembly.
Its a good idea to leave a couple inches between the aquarium and the wall to route cords and allow access to the back of the aquarium if needed. Remember, once you fill your aquarium with water, moving the aquarium will only be possible if you first drain the tank.
Step #2 The Pump and Filter Cartridge
Once the aquarium is in place, pull the power cord connected to the main return pump out of the opening in the canopy located directly above the pump. Do not plug the pump in yet.
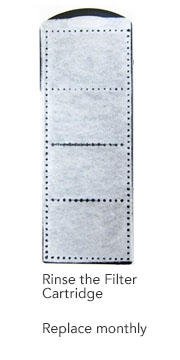
Open the bag containing the BioCube Filter Cartridge and rinse it in your sink with tap water. Place the cartridge on top of the media rack in the middle chamber.
The BioCube Filter Cartridge should be replaced monthly. Save money by purchasing a multi-pack, such as the BioCube Filter Cartridge 12-Pack.
|
Step #3 Sand and Rock
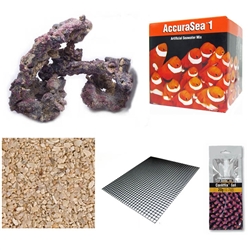 Before filling the tank with water, add sand and rock. When choosing rock there are two options: live rock and dry rock. Live rock is harvested from the ocean floor and has bacteria and other microorganisms living on the surface of the rock. These micro organisms help keep the aquarium clean and provide a natural food source for the fish and corals in the aquarium. Dry rock has no life on the surface. With live rock your aquarium will mature faster and replicate natural conditions better. As a cost-saving measure you can use a mix of live rock and dry rock.
NOTE: If you do decide to use live rock, you will want to prepare your saltwater before adding your rock. Skip ahead to the Step #4 Add Saltwater section. Before filling the tank with water, add sand and rock. When choosing rock there are two options: live rock and dry rock. Live rock is harvested from the ocean floor and has bacteria and other microorganisms living on the surface of the rock. These micro organisms help keep the aquarium clean and provide a natural food source for the fish and corals in the aquarium. Dry rock has no life on the surface. With live rock your aquarium will mature faster and replicate natural conditions better. As a cost-saving measure you can use a mix of live rock and dry rock.
NOTE: If you do decide to use live rock, you will want to prepare your saltwater before adding your rock. Skip ahead to the Step #4 Add Saltwater section.
We do not sell live rock. We sell two types of dry rock: CaribSea LifeRock Shapes and Two Little Fishies Stax Rock. Both brands look realistic and contain the pores necessary for biological filtration.
Personal preferences vary, but most people will use around 7.5 pounds of rock and 6 pounds of sand for the BioCube 16, and 15 pounds of rock and 12 pounds of sand for the BioCube 32. For the BioCube 32 we sell the SALT, SAND & ROCK PACKAGE for the Coralife Size 32 LED BioCube. It includes the perfect amounts of LifeRock and Seafloor Reef Sand along with salt, glue, and egg crate.
If the bottom of your rock is not smooth you may want to put some small pieces of plastic or lighting egg crate at the bottom of your tank to set the rock on to protect the glass. We sell Egg Crate, and it's included in Deluxe Reef Package and the Ultimate Reef Package. Add your rock one piece at a time to create an attractive structure in the aquarium. Go easy with the rock as your corals will grow to fill the space. You also want to be sure there is space for the water to circulate.
Try to avoid placing rocks very close to the viewing panels so that you can easily clean the glass in the future. It helps to use coral glue or an underwater epoxy to hold rocks together and make sure the structure is stable. We sell a number of adhesives for gluing together the rock and attaching corals to the rock. Take a look at the BioCube 32 Rock, Sand, and Salt Package Guide to see how this is done.
Aquarium sand should be rinsed to avoid excessive cloudiness. Its best to rinse sand outside. Place the sand in the bottom of a bucket dedicated to aquarium use. Then turn on a hose and put it in the bucket. Let the water in the bucket overflow. Stir the sand with the end of the hose until the water running out of the bucket is no longer milky, but clear. At this point you can pour off the excess water and pour the sand into the aquarium.
|
 Step #4 Add Saltwater
Once your sand and rock are in place you can begin adding water to the aquarium. If you used live rock then you must mix saltwater before adding the rock to the aquarium.
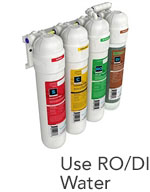
Mixing saltwater starts with water. All of the water that enters your aquarium should first be purified through an RO or RO/DI system (RO/DI is purer and will result in less algae). You can purchase RO/DI water from your local fish store or RO water from a machine in front of a grocery store.
You can also make the water yourself using your own
RO/DI System. We recommend purchasing the AquaticLife Twist-In 4 Stage Compact RO/DI Unit.
To mix saltwater, start with RO/DI water and then add some salt mix. Each manufacturer will have its own recommendations for how much salt mix to add, but it is generally around a ½ cup for every gallon of water.
We highly recommend using the Two Little Fishies AccuraSea1 Artificial Seawater Mix. AccuraSea1 normally comes in the 50 gallon size with ten bags that each will produce approximately 5 gallons of seawater. We sell the entire 50 gallon size as well as a 10 Gallon, 15 Gallon, 25 Gallon, and 30 Gallon sizes. The 15 Gallon Size is appropriate for the BioCube Size 16 and the 30 Gallon Size is appropriate for the BioCube Size 32. We prefer the AccuraSea1 for a couple reasons. For one, it's very high quality salt. But just as important as its quality is the way it is packaged. Many competing dry salt mixes are not carefully blended. Unless you use the entire bag, each mix you produce may not be the same. And when a bag of salt is not used in its entirety humidity gets in and reacts with the salts, producing insoluble residuals that fundamentally change the formulation. AccuraSea1 avoids this problem by having ten precisely measured bags that are small enough that you will always mix the entire bag.
Keep in mind, when you have a saltwater aquarium you will want to have extra salt on hand for water changes. For this reason you may want to get extra salt and purchase the full-sized Two Little Fishies AccuraSea1 Artificial Seawater Mix. If you have a BioCube 16 and just want some water for water changes you might be interested in the 10 Gallon. For water changes you might want to purchase the Two Little Fishies AccuraSea1 Artificial Seawater Mix with a Blue Life 5 Gallon Water Jug or just the Blue Life 5 Gallon Water Jug.
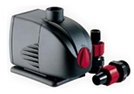
You will also need a pump to mix the salt in the Jug. We recommend using the
Lifegard Aquatics Quiet One Pro Model 400.
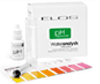
The salt needs to be mixed into the water either by hand or with a small submersible pump. Once it looks as though all the salt is dissolved, confirm the salinity by testing with a refractometer or hydrometer.
A hydrometer is a simple and affordable piece of equipment that measures salinity by comparing the density of water. The more salt, the denser the water. A refractometer is a more precise instrument that measures salinity by using the refractive properties of saltwater.
Hydrometers such as the Coralife Deep Six Hydrometer and the Instant Ocean Hydrometer will be suitable for most people, but refractometers such as the MarineAndReef.com Reefractometer are more accurate and easier to read. The salinity should read between 1.025 and 1.026 specific gravity. If the salinity is too high, more water needs to be added. If too low, then add more salt.
After you have confirmed the salinity of the saltwater, pour it into the aquarium. Its best to pour the water onto the rockwork to stop the force of the falling water from disturbing the sand. Continue adding water until the main aquarium and back compartment are both full. The water level in the back compartment can be viewed through the window on the left side of the back filtration area. You can stop adding water once the water level reaches the max water level mark or slightly above on the viewing window.
For those putting together a reef aquarium who are interested in getting the correct amount of salt, sand & rock (as well as egg crate and glue) for the Coralife Size BioCube, we have the Coralife Size 32 LED BioCube Aquarium Reef SALT, SAND & ROCK PACKAGE. This package has what we feel is just the right amount of everything. Please take a look at the BioCube 32 Rock, Sand, and Salt Package Guide for more details.
|
Step #5 Time to Plug In The Pump 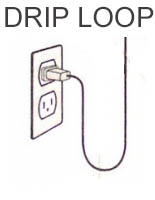
Once there is saltwater in the aquarium, you can plug in the main return pump and start water circulation within the aquarium. However, make sure the cord leading from the pump to the outlet has a drip loop. Drip loops should be installed on every single piece of aquarium equipment to ensure the safety of you and your home. A drip loop is where the cord coming from the pump or other aquarium device first dips down below the level of the outlet and then rises back up to the level of the outlet. The drooping piece of cord ensures that any water that drips down the cord will drip onto the floor rather than enter the outlet where it could lead to an electrical fire.
After the pump is plugged in. the aquarium will be cloudy. This should subside after a couple days. You can turn the light on momentarily to view the aquarium. But in order to prevent algae, do not turn on the light for extended periods of time. Once the process of cycling the aquarium is complete, the light can be programmed.
2. Cycling the Aquarium
For accompaniment to this article, view the
How To Cycle A BioCube Aquarium Video
Cycling your BioCube Aquarium is a critical step. The process of cycling is where the natural bio-filter of the aquarium is established. The vast majority of the filtration in any given aquarium is not from the filter but from the living bacteria in the aquarium. The bacteria comes from the air, bodies of the fish, and live rock. This bacteria will break down fish and food waste into less toxic compounds so your fish and corals can live.
Step #1 Add a Food Source

For the cycling process to start you must first provide a food source for the beneficial bacteria. Traditionally this was done by adding a couple of very hardy fish, such as damselfish, to the aquarium. This has lost popularity because the damselfish often die from the abnormal amount of waste in the water and because damselfish are very aggressive fish that will likely kill any new fish introduced to the tank. If you do decide to add damselfish you can add two to the BioCube 16 and three to the BioCube 32. You should feed them regularly during cycling and remove them after the cycling is complete.
Another method of adding a food source to the aquarium is to add some fish food to the aquarium and simply let it rot. You can use flake or pellet food, but most people prefer adding a larger food source such as a couple of frozen krill or a frozen shrimp. These foods will rot away for a week or so, and then you can pull out what is left. This method avoids the problems with damselfish, but you wont be able to add any fish to the tank for the 3-5 week cycle.
Step #2 Wait For Nature to Works Its Magic
Once you have added a food source for the bacteria, your aquariums ammonia level will rise. Ammonia is toxic to fish, but the nitrifying bacteria in your aquarium will soon proliferate and begin breaking down the ammonia.
When the nitrifying bacteria break down ammonia, it produces nitrite. Nitrite is less toxic than ammonia but can still be dangerous to your fish. Another group of nitrifying bacteria will then proliferate and break down the nitrite.
The byproduct of nitrite reduction is nitrate. Nitrate is only mildly toxic to fish and corals, yet its still undesirable because it can also cause excessive algae growth. In the ocean, a specialized group of bacteria removes nitrate from the water by converting it into nitrogen gas. In the aquarium, nitrate is usually removed through water changes.
Live rock and live sand will speed up the nitrification process, and you can also add bacteria to enhance nitrification. We recommend using
Brightwell Aquatics MicroBacter7 250 ml.
During the coming weeks you will want to test for ammonia, nitrate, and nitrite tests. The
Aquarium Pharmaceuticals Saltwater Master Test Kit includes ammonia, nitrate, and nitrite tests. You will not need to test for calcium, alkalinity, or pH until after you add corals.
Go to: MarineAndReef.com/Test to see our complete selection of test kits.
Go to: MarineAndReef.com/Test to see our complete selection of
test kits.
Step #3 Monitor the Cycle
During the cycling process you will need to monitor the aquariums water parameters so you can know where your aquarium is in the cycling process. Testing weekly or bi-weekly is sufficient. You should test for ammonia, nitrite, and nitrate each time you test. Many local fish stores will test ammonia and nitrite for free. After the cycle you shouldnt need to test for ammonia and nitrite unless there is a serious problem.
During cycling you will also need to regularly add top-off water to your BioCube. When water evaporates, only the water leaves the aquarium, not the salt, so you should always top it off with fresh water. As with your original aquarium water, your top-off water should be purified with an RO/DI system. Make sure to fill the tank to the same level it started with. If you add too much fresh water, it will lower the salinity level in the aquarium.
Once your test results show there is no more ammonia and nitrite in the water, the cycle is complete and you can begin preparing to add fish. The entire cycle process usually takes 3-5 weeks.
Step #4 Preparing for Fish
When you finish cycling you will need to perform your first water change. The water change will help remove the nitrate left over from cycling your tank. About 1/3 of the tank water should be changed initially. This amounts to about one 5-gallon bucket for the BioCube 16 and two buckets for the BioCube 32. Make sure to prepare your water ahead of time just as you did when you initially filled the aquarium.
Before removing the dirty water you should clean the algae off the glass of the aquarium with a
Coralife BioCube Algae Cleaning Magnet or an algae pad such as a
Seachem Duo Algae Pad. Then you can remove water from the aquarium by using an
Aqueon Aquarium Water Changer or
Python No Spill Clean & Fill gravel vac. Unplug the main return pump and then place the gravel vac in the aquarium. Gently suck on the hose end of the gravel vac to start the siphon and then place the hose end in a bucket. Gently push the gravel vac into the sand removing as much waste as possible. Once you have removed the dirty water from the aquarium, you can pour the new saltwater you prepared into the aquarium and turn on the main return pump.
At this point you should do your first
cartridge replacement. You should replace the cartridge before you add fish so that your filtration is functioning optimally. Rinse the new filter cartridge just as you did with your original cartridge.
Step #5 Let There Be Light
Now that the cycle is complete, you can program your BioCube lights. Before you start programming there are a couple things to keep in mind. The lights do not need to come on when the sun comes up. If youre home in the evenings, then have the lights run when youre home and not at work. Also, remember that running your lights longer can lead to excessive algae.
A reef aquarium should have a photo period of twelve hours a day (corals in nature experience light close to 12 hours a day throughout the year). However, you do not need intense light for twelve hours. If your aquarium is in a room with ambient light, then running your LED lights six to eight hours a day is adequate. You can run the relatively dim
Channel 3 blue LEDs when the main lights (
Channel 1 &
Channel 2) are turned off.
Start by plugging in the BioCube lights (make sure to include a drip loop in the power cord). Turn the hood on. Just press the
MENU button to cycle through setting the clock, and setting the on and off times for
Channel 1,
Channel 2 and
Channel 3.
Press the
MENU button repeatedly until either the
12H or
24H is displayed on the screen. Or, you can use the up and down arrows to switch between regular and military time. Once you have selected your preference, press
Menu again to set up the clock.
A clock icon should be displayed when setting up the clock. Use the up and down arrows to change the hour. After setting the hour, press
Menu again and then set the minutes. Pressing
Menu again will take you to
Channel 1 (you will see the numeral 1 in the lower left of the screen).
Channel 1 is for the daytime LEDs. We recommend running these lights run for four to six hours a day. There should be the word
on displayed on the right of the screen. Use the arrows to set the hour. Pressing
Menu again will allow you to set the minutes. Pressing
Menu again will allow you to set the off time for
Channel 1 the same way you set the on time.
Pressing
Menu again will take you to
Channel 2, which is for the blue LEDs. We recommend running the blue LEDs run for six to eight hours a day, starting and ending about an hour before and after the white LEDs. You can set the on and off times just as you did with
Channel 1.
If your aquarium is in a basement or a room that gets zero ambient light we recommend running
Channel 2 for twelve hours a day.
Pressing
MENU another time will take you to
Channel 3, the lunar light channel. Most people will run the lunar lights either a few hours after the main lights turn off or all night long. You can set the time just as you did for
Channels 1 and 2. After you program the lunar lights, pressing
MENU will take you back to the time display. At that time your programming is complete.
3. Adding LivestockFor accompaniment to this article, view the
Adding Livestock to a BioCube Aquarium VideoAdding livestock is the most exciting part of setting up your BioCube Aquarium. Here are some basic guidelines that can make it simple.
Temperature
Marine aquariums and reef aquariums should be kept at a temperature close to 78F. In general, the acceptable range of temperatures is from 76F to 80F. Before adding livestock, be sure your temperature is consistently close to 78 degrees. To accomplish this you will need a
thermometer, and in almost all cases you will need a
heater. In some cases you will need a chiller. We discuss heaters and chillers in the Upgrading Temperature Control section later in this Guide.
Adding Fish
When selecting what kind of fish to add to your aquarium, consider the eventual adult size of the fish as well as the temperament of the fish. Fish that grow excessively large or are extremely aggressive should be avoided. You should also avoid fish with difficult dietary needs and other hard to satisfy care needs. Selecting fish should start before you walk into the fish store. Using the internet or an aquarium guide book can direct you to some species that are well suited for your aquarium. A quick list of some suitable kinds of fish include: Clown Fish, Gobies, Blennies, Dwarf Angelfish, Fairy Wrasses, Chromis, and Basslets.
Once you have selected what kind of fish you would like to add, you will need to select the individual fish you would like to purchase. When selecting fish make sure to choose fish from clean aquariums with no dead or dying fish. Inspect the fish to ensure its free of wounds, blemishes or spots. The fish should be eating, plump, and responsive to stimuli. A skinny fish is prone to disease and is likely being bullied by its tank mates. Ask the employees at your local fish store to feed the fish for you and only buy fish that you see eat. It is also a good idea to use the same food that you saw the fish eat.
After you pick out your fish you will need to take it home and acclimate it to your water. When you are transporting your fish try to keep the fish in a dark temperature controlled environment. Bringing a small cooler along is ideal. While a fish can survive in a bag for long periods of time, you want to minimize the stress on the fish by reducing the amount of time that the fish is in the bag. Try to go straight home after purchasing your fish.
Once you have the fish home you can start the acclimation process. Float the fish in the bag on the surface of the aquarium for 15 minutes. This will equalize the temperature between the water in the bag and the water in your aquarium. After the temperature is equal you can open the fish bag and pour the fish with water into a small pitcher, bucket, or other container.
Slowly drip water from the aquarium into the container with the fish. You can do this with a piece of aquarium airline tubing. Place one end in the aquarium and the other end in the container with the fish. Make sure that the container with fish is lower than the water level of the aquarium. Gently suck on the end of the hose going into the fishs container to start a siphon. After starting the siphon, tie a knot in the hose. The tighter you pull the knot, the slower the water will drip, and the more you loosen the knot, the faster the water will drip. You want a drip rate that is right between a drip and a stream. Put one end of the hose in the tank and one end in the aquarium until the water level in the container has approximately doubled. This should take about 45 minutes. You can then net the fish out and put it in the aquarium.
After you have put the fish in your tank, throw out all of the water in the container that the fish was in. You never want to add any water that is not your own to your tank. You may need to add a little bit of fresh saltwater back to the aquarium to make up for the water that you lost.
After your first fish you can add more. Be very careful not to add too many fish too quickly or too many fish in total. No more than one to two fish should be added at a time to the aquarium. Wait at least a week before adding more fish and stop adding fish once the tank becomes too difficult to keep clean or the fish continually fight over territory. Most BioCube Size 16 Aquariums should have three fish or fewer and BioCube Size 32 Aquariums should have five or fewer fish.
Adding Invertebrates
There are a variety of invertebrates you can add to your BioCube. These include motile invertebrates such as shrimp, snails, and sea stars. You can further categorize these into cleaner invertebrates and ornamental invertebrates. Cleaner invertebrates are much easier to care for and can be added soon after the tank is set up. Cleaner inverts, often called the cleanup crew, tolerate dirty water well and dont require any specialized feeding. The biggest problem with the clean up crew is they often starve. Because of this, do not add a cleanup crew until there is something to clean. Once you notice algae growth and detritus accumulation you can add a cleanup crew. The most common cleaner inverts are snails and hermit crabs. Make sure not to add too many cleaners. This can lead to the clean up crew starving and dying. If you are unsure of how many snails or crabs to add, then remember that you can always add more down the road if there are still algae and detritus to feed them. Snails and crabs are very hardy, but it is still best practice to acclimate them in the same manner as you would fish.
Ornamental invertebrates such as sea stars, shrimp, some crabs, sea cucumbers, and lobsters can all be added to a BioCube. Most ornamental invertebrates are more sensitive to water parameters and should be added after your fish when the tank is more stable. When selecting what invertebrates to add, do the same research as you would for selecting fish. Find out what the animals maximum size is as well as its diet. You dont want to buy a cute little lobster only to find that it will grow to two feet long and eat all your fish.
Selecting invertebrates is more difficult than selecting fish. Make sure that the animal has no wounds or unusual growths. The invertebrate should be responsive to food and touch, but keep in mind that some invertebrates like sea stars move very slowly even when fed and touched. Once you have selected your invertebrate you can transport it home and acclimate it the same way that you would a fish. The only difference is that many people prefer to acclimate invertebrates slower because of their more sensitive nature. Its not unusual for the acclimation process to take as long as 2 hours for some sensitive invertebrates.
The stocking limit for ornamental invertebrates is based on space and food. Scavengers only have so much to scavenge, so you may need to stop adding invertebrates once the tank is free of leftover food. Invertebrates can also be limited by space. Many invertebrates such as shrimp will live in caves and once all the caves are full they can start fighting. Most people will include two to three ornamental invertebrates in a BioCube 16 and three to five in a BioCube 32.
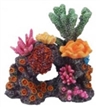
Adding Corals
Fish are what get people interested in the hobby, but coral are what keep people interested. Once your tank is up and running it is likely that coral will be your primary focus.
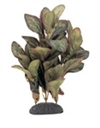
Coral are more sensitive than fish and should usually be added after your first few fish when your tank is more established. When adding corals make sure to do your research ahead of time. Corals all have different lighting, flow, and food requirements, and there is a huge range of difficulty levels when choosing corals. As a beginner, its best to start with soft corals (corals without bones). Soft corals are more forgiving than stony corals and can be just as beautiful as stony corals.
When youre picking out your coral, look to see that there are no obvious cuts or wounds on the coral. Even if the cuts are intentional for propagation purposes, its best to let these wounds heal before taking the coral home. The corals polyps (mouths) should be open and willing to accept food and the coral should have visible signs of growth. The best sign of growth is encrustation. The coral should be completely smothering the rock or plug it is on so that you know that the coral was not recently glued down but has been growing in place for a while.
Coral do not need to be acclimated like fish and invertebrates. However, it is wise to use a coral dip before putting them in your BioCube. Dipping your corals in a coral dip like
Two Little Fishies Revive Coral Cleaner helps prevent parasite outbreaks in your tank. To dip your coral, take some water out of your aquarium and mix in the manufacturer recommended amount of coral dip. Take your coral and gently swish it in the solution for the manufacturers recommended amount of time (usually around 10 minutes). Remove the coral, rinse it in a separate container with tank water, and place the coral in your tank. When placing corals in your tank it helps to use
coral glue or epoxy to mount the corals in place and keep them from falling off the rock work.
Add as many corals as you want to your BioCube. Just make sure they do not touch each other because corals can sting and overgrow each other.
4. Regular Maintenance
To keep your animals healthy and your tank looking good your, BioCube requires regular maintenance. You need to clean the aquarium, feed the aquarium, supplement the aquarium, and service your equipment. To make sure that you perform regular maintenance it is best to stick to a schedule.
Daily Maintenance
Observe your animals. Make sure that you look at all of your corals, fish, and invertebrates to ensure that theyre all eating and responsive.
Feed your tank. Fish should be fed on a daily basis and some corals should also be fed regularly as well.
Clean the glass. Its best to clean your glass daily. Using an algae magnet like the
Coralife BioCube Algae Cleaning Magnet or the
Flipper Nano 2 In 1 Magnet Aquarium Algae Cleaner will make daily cleaning easy.
Top off the tank. Every day you should check the water level in your BioCube to make sure its not too low. Once it has dropped noticeably top off the tank using RO/DI water.
Supplement your tank. Some supplements such as amino acid and iodine supplements need to be dosed daily. Read the manufacturers recommendations and stick to them to get the full effect of your supplements.
Weekly Maintenance
Water changes. Water changes should happen at least monthly, but many people prefer doing a small water change every week rather than a large water change every month. If you like adding lots of fish and feeding lots of food, then you may have to do weekly water changes.
Test your water. When you first start your tank it is very important that you regularly test your water. Testing weekly can let you know where your tank is in the cycling process, and it can also alert you to problems before they get out of control. Once the tank is established you should still test weekly for nitrate, phosphate and alkalinity. Your calcium levels will also be important, but you can just test for alkalinity. This is because calcium and alkalinity levels both drop as corals grow and are consumed in
proportion to each other. Because the alkalinity test is easier to
perform and it more accurate, we recommend only testing for calcium if
your alkalinity level has changed. We recommend using the
Aquarium Pharmaceuticals Saltwater Master Test Kit and the
Aquarium Pharmaceuticals Phosphate Test Kit.
In a BioCube aquarium, water changes using any reef salt should replenish any calcium and alkalinity the corals use.
Assuming you have cycled your aquarium properly, you should not need to test for ammonia and nitrite. However, if a fish or coral dies it may be an indication that you have ammonia or nitrite in the aquarium.
Monthly Maintenance
Water changes. If you dont do weekly water changes, you should do water changes at least once a month. Change at least 1/3 of the tanks volume at least once a month. Doing water changes more often than this can help, but changing more than 50% of the water at once can be stressful on your animals.
Replace your filter cartridge. Replacing your
filter cartridge monthly, just as you did before you added fish. A fresh cartridge will be free of debris and have fresh activated carbon to absorb impurities.
Clean the top of the aquarium and the light lens. The surfaces of your BioCube will be splashed because of the water movement in the aquarium. Over time this splashing will form salt creep. Salt creep forms when saltwater lands on a surface and the water dries up, leaving the salt behind. The result is a crusty salt build-up on the surface of the aquarium. Clean off this buildup with a damp rag. The most important area to clean is the lens cover of your light. When salt creep builds up on the light cover it will limit the amount of light entering the aquarium and getting to your corals. Cleaning the cover regularly can prevent this.
Test your water. While some testing should be done weekly, some tests can be done once a month without a problem. Testing salinity, calcium, and magnesium monthly can ensure that these parameters are where they should be. Testing for salinity was discussed in the
1. GETTING STARTED section. We recommend the
Aquarium Pharmaceuticals (API) Calcium Test Kit and the
Salifert Magnesium Aquarium Test Kit to test for calcium and magnesium.
Bi-annual Maintenance
Clean the main return pump. Cleaning your main return pump will help it last longer and pump more water. Unplug the main return pump to the BioCube and remove it for cleaning. Disassemble the pump by removing the screen cover by pulling it away from the main body of the pump. Then rotate the impeller cover so that the grooves on the side are out from underneath the clamps on the pump body. After youve rotated the impeller cover, pull the impeller cover away from the main body of the pump. You can then reach inside the body of the pump and remove the pumps impeller.
Once you have the pump disassembled you can clean all of the pieces with a tooth brush and then re-assemble the pump. If you have another pump in the aquarium to oxygenate the water, you can use vinegar to remove calcium deposits on your pump (you should always have at least one pump running). Pour some white vinegar in a small container such as a pitcher, lower the pump into the vinegar, and then plug the pump in. Wait for a couple hours, or overnight, and then rinse the pump off in the sink and return it to service.
Clean your light. Beyond regularly cleaning the light cover you should unscrew the light cover and use compressed air to clean dust and debris from the LED panel and the cooling fan. This will help insure that the light is properly ventilated and that the fan is functioning properly.
Clean any other electronic equipment. If you have added any other equipment such as a protein skimmer, circulation pump, or media reactor, the pumps running these pieces of equipment should also be cleaned. You can clean these pumps in the same way that you cleaned the main return pump. If you have added a heater or chiller, recalibrating it regularly can ensure that it is maintaining the correct temperature.
NOTE ABOUT SUPPLEMENTS:
While reef aquarists with larger tanks add calcium, trace elements, and buffer to their aquariums, if you do the regularly prescribed water changes these additives will not be necessary. When you do water changes you will be adding fresh salt that has calcium and trace elements. An advantage of smaller aquariums is the relative ease of doing regular water changes.
5. Upgrading Your BioCube
As your aquarium matures and you become more experienced you will want to find ways to improve your BioCube. You can upgrade your tanks filtration, circulation, lighting, temperature control, and automation. These upgrades will reduce maintenance and increase the functionality of your aquarium so that you can keep more delicate animals with less work.
Upgrading Filtration
When you receive your BioCube the back filtration area is intentionally left empty. This is so that you can customize the filtration to your liking. The simplest way to boost your filtration is to add some chemical filter media to the trays in the center chamber of the filtration area. The most common filtration media is activated carbon. Carbon will help to improve water clarity, reduce odors, remove heavy metals, and remove dissolved organic compounds. We recommend using the
Inland Sea 6 oz Pelletized Activated Carbon for the BioCube 32 and
Inland Sea 3 oz Activated Carbon for the BioCube 16.
Another option is to add a form of resin filtration. Popular resins include
Seachem Purigen,
Poly-Bio-Marine Poly Filter Pads, and
Chemi-Pure Blue. Resins last longer than carbon and can remove compounds carbon cant, such as ammonia, nitrite, and nitrate. Resins are also better than carbon at removing heavy metals.
A third option is to add a dedicated phosphate remover such as
Seachem Phosguard, or a GFO such as
Two Little Fishies PhosBan. Phosphates can be particularly problematic because they lead to excessive algae growth and poor coral growth. There are multiple trays in the back chamber, so using more than one of these filter medias is possible.
A second way to upgrade the filtration is to add a protein skimmer. A protein skimmer is a filtration device that uses bubbles to remove proteins and dissolved organics from your water. Protein skimmers do not use any filter media and require very little maintenance.
We highly recommend using a protein skimmer. Protein are the best way to filter marine aquariums.
Protein skimmers require adjustment to get the proper blend of water and air. The water level in the aquarium can affect how a skimmer is tuned. If you use a skimmer, its very important that you keep your aquariums water level consistent. You can do this by topping off the aquarium on a daily basis or by using an auto top off.
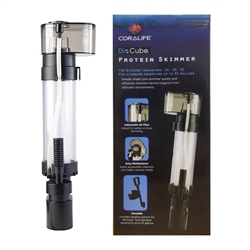
The
Coralife BioCube NEW STYLE Protein Skimmer with Needle Wheel Pump are the only protein skimmers designed specifically for the Coralife BioCubes. The original Coralife BioCube Protein Skimmer fits in the first chamber of either the BioCube 16 or 32. The NEW STYLE Skimmer is a more traditional style skimmer with a water pump with a needle wheel impeller while the original uses an air pump and
airstone. To adjust the old style skimmer you turn a small valve connected to the air pump powering the skimmer. The new style skimmers can be adjusted by using the air valve connected to the venturi water pump. It fits into the first chamber of the BioCube 32. With the BioCube 16 you will need to remove the media basket and the drip tray and put the Skimmer in the middle chamber.
The original Skimmer has an airstone at the bottom of the skimmer that will clog and need replacement about every other month. The NEW STYLE skimmer does not use airstones that require replacement. We recommend adding an Air Silencer to the NEW STYLE BioCube Skimmer to ensure quiet operation.
A more powerful skimmer to use with the Coralife BioCube 32 (NOT 16) is the
Tunze Comline DOC Skimmer 9004. This skimmer fits into the middle chamber if you take out the BioCube media basket. There are other skimmers that will fit, but they will need to be modified to fit. The modification of these skimmers is beyond the scope of this guide.
For more info on protein skimmers please read our
Aquarium Protein Skimmer Overview article.
A third way to upgrade your tanks filtration is by adding a refugium. A refugium is a refuge for beneficial animals and algae that cant survive in the display tank because fish in the tank will eat them. The most beneficial organism in a refugium is macro algae. Macro algae is a seaweed-like algae that absorbs nutrients, raises pH and provides a home for beneficial micro organisms.
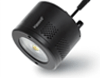
The middle chamber of the BioCube can be converted to a refugium with the addition of a light. The
Coralife Mini LED Aqualight was specifically designed for this purpose. The light uses double-sided tape and a bracket to affix to the back of the BioCube and provides macro algae in the middle chamber with plenty of light to grow. Another good choice is the
JBJ Nano Glo LED Refugium Light. For the BioCube 16 one will suffice. Two are needed for the BioCube 32.
When converting the chamber to a refugium you may want to just grow some algae in the stacking media rack in the middle chamber. This is the simplest solution. Some prefer to let algae grow and fill the entire back chamber and others will prefer to let the algae grow on the rack itself for quick removal. We recommend chaetomorpha algae over any other kind of algae because it is easy to find, affordable and effective. You can purchase chaetomorpha at most local fish stores. To use, just place a clump of the algae in the middle chamber. You may also choose to add some live rock as a place for amphipods, worms, and sponges to live in.
You can then add your light and start growing the algae. We recommend putting a timer on the light so that it is on a reverse daylight schedule. A reverse daylight schedule is where the light is on whenever the main lights are off. For example, if your aquarium lights are on from 11:00 in the morning till 8:00 at night then you will want the refugium light to be on form 8:00 at night till 11:00 in the morning. A reverse daylight schedule ensures that your tank has a more stable pH because the algae raises the pH when it is lit and the tanks pH is the lowest when the main lights are off. The increased stability that comes from a reverse daylight schedule may be one of the greatest benefits of a refugium.
If you want to keep some space open for an after market protein skimmer, then use the Media Basket alone along with a smaller refugium light such as the
JBJ Nano Glo LED Refugium Light. This is a good solution for those using larger more powerful skimmers such as the
Tunze 9001. We do not recommend using the Fuge Basket with an aftermarket skimmer because the basket is not well screened off and algae can often fall out and clog the skimmer pump.
You could use the Fuge Basket with the
Coralife BioCube Skimmer as that skimmer is small enough to fit in the first chamber where it is adequately separated from the Fuge Basket.
The only maintenance on a refugium is pulling some of the algae out once a month to allow new algae to grow and replacing the light bulbs in the Mini Aqualight about once a year to ensure that the algae is receiving plenty of light.
Upgrading Flow
The water flow in the BioCube is certainly sufficient for a freshwater planted tank or a fresh or saltwater fish-only tank. However, those with reef tanks may want to upgrade to a stronger pump. This can be done by changing the pump in the back compartment of the BioCube, by adding a circulation pump in the main tank, or both.
Increased water movement serves several beneficial roles. Water movement oxygenates the water, which is necessary for your fish to breath, and helps to elevate pH. Water movement also stirs up debris in the tank so it is lifted into the water column where it can be filtered out by your filter cartridge or protein skimmer.
Yet, water movement alone is not what corals are accustomed to. The water movement in the ocean is not a constant speed from a single direction. Instead the ocean is more like the random sloshing inside a washing machine. This is the type of flow you want to replicate in your BioCube. The
Tunze Turbelle Nanostream 6040 Pump and
Hydor Aqamai KPS Wi-Fi Controllable Wavemaker Pump will both change the direction and vary the water flow in a manner similar to the ocean (
these pumps are discussed in detail later in the Guide). Corals have adapted to this powerful, varied wave action flowing over them for millions of years, and when this is removed corals can become stressed and eventually die. Corals also need ample water movement to filter feed, sexually reproduce, and to remove their excreted waste.
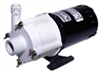
To replace and upgrade your return pump flow you need to find a pump that can fit in the pump chamber and connect to the plumbing from the original pump. The most popular replacement pump is the
Marineland Maxi-Jet 1200 Pro Power Head. This pump directly attaches to the plumbing of either the BioCube 16 or 32.
Another upgrade to the main return pump is replacing the return nozzle with a rotating device. These devices will redirect the flow from the return pump so that there is a wave-like motion in the tank. The
Hydor FLO Rotating Water Deflector can both replace the return nozzle and introduce rotating water flow. With both of these products you might need additional pieces to fit the BioCube. For the Hydor FLO, if you have upgraded the main pump, we recommend putting a short piece of airline tubing over the center shaft to prevent the FLO from being pushed into the tank. When buying the FLO for a BioCube, you can ask us (
in the Order Comments section at checkout) to include a small piece of tubing for free.
Adding dedicated circulation pumps to the aquarium can significantly improve the water flow inside your BioCube. Some better pumps are the
Tunze Turbelle Nanostream 6040 Pump and
Hydor Aqamai KPS Wi-Fi Controllable Wavemaker Pump. All of these pumps use reliable magnets to attach the pump to the aquarium, and have the ability to be controlled. The
Rossmont Waver will allow you to control up to two Rossmont Pumps through a tablet or phone. The
Tunze Turbelle Nanostream 6040 Pump is smaller than the Rossmont Mover Pump but with comparable flow, and it has a unique design that allows it to be easily hidden behind rockwork. The 6040 also has a built in simple controller for variable flow. This is ideal for people who want controlability but are intimidated by a computer application. The
Hydor Aqamai KPS Wi-Fi Controllable Wavemaker Pump is the most advanced option. The pump flow is ready to be controlled with a free phone/tablet app out of the box. This pump is quite strong (
up to 1050 gph) even though its the smallest pump in the list.
Most people will mount their circulation pumps against the back wall of the aquarium so the viewing panels of the aquarium are clear and easy to see through. If youre keeping demanding SPS coral you may benefit from two or more pumps in the tank.
Upgrading Lighting
The lights that come with the BioCube are great for keeping a mixed tank with light loving corals at the surface and less demanding corals at the bottom of the tank. If you want to put the light demanding corals all throughout the tank you may want to upgrade your lighting.
Typically, upgrading the BioCube lights requires removing the aquarium hood and adding a light over the top of the aquarium. Some aquarists have added extra lights to the canopy, but this process is difficult and often requires extensive modification.
To remove the canopy, unplug the canopy and locate the pins that attach the canopy to the aquarium. You can pull these pins out by grabbing both ends of the pin and pulling in opposite directions (you might need pliers). This will separate the pins from their locking end caps. Once the pins are removed you can lift the canopy off of the tank.
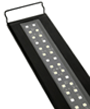
When youre selecting what light to put over the BioCube you will need to limit your search to pendent style LED lights. This is because few light fixtures will fit properly on aquariums with the BioCubes shape. While there are a variety of LED lights to choose from the Kessil LED lights stand out from the rest. These lights are affordable, attractive, and powerful. On the BioCube 16 either a
Kessil Tuna Blue A80 LED Light or
Kessil A160WE Tuna Blue LED Light Fixture are good choices with the A160WE being for the most demanding tanks. On the BioCube 32 the
Kessil A160WE is a good choice. This light upgrade will not only allow you to keep more demanding corals easier but also let you to enjoy your tank more because of the more attractive light spectrum.
Upgrading Temperature Control
Most people will not need to add a chiller or heater to their aquarium. Any temperature between 76 and 82 is acceptable for a reef aquarium, and most aquariums will naturally stay in this range without any additional effort. However, if your home temperature is in the low 70s or mid 80s then you will need to look into ways of chilling or heating your BioCube.
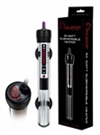
Heating the aquarium is much easier than chilling it. Adding a simple and affordable aquarium heater such as a classic Lifegard heater, or BiOrb heater will ensure that you aquarium stays warm enough. The BioCube 32 can accommodate a 100 watt heater (
Lifegard Aquatics 100 Watt Pre-Set Quartz Glass Aquarium Heater or
Oase HeatUp 100 Watt Aquarium Heater), and the BioCube 16 only needs a 50 watt heater (
Lifegard Aquatics 50 Watt Pre-Set Quartz Glass Aquarium Heater or
Oase HeatUp 50 Watt Aquarium Heater). The heater is usually placed in either the first or third chamber of the BioCube. If you decide to place a heater in the third chamber, you will need to raise the water level in the third chamber so that the heater stays submerged.
Aquarium chillers are far more expensive than aquarium heaters. Fortunately, the new LED BioCubes run much cooler than the older fluorescent BioCubes, which sometimes had heat issues. Despite using LEDS, if your aquarium is in a hot room a chiller may still be necessary. Before adding a chiller, try adding a fan (
JBJ C-Breeze CF-55 Nano Aquarium Cooling Fan) to stop heat from building up inside the aquarium. Often the fan alone can drop the temperature 3-4 degrees.
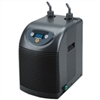
If a fan doesn't do the job, adding a nano chiller such as a
JBJ 1/15HP Mini-Arctica Aquarium Chiller will insure that your aquarium stays cool enough. Chillers must be plumbed inline, making their installation a little difficult. The most common way to install a chiller is to use the main return pump to pump water out of the aquarium, and through the chiller, and then pump back from the chiller to the outlet inside the aquarium. Because of the extra work required for the pump to push water through the chiller, its a good idea to upgrade your pump when adding a chiller.
Upgrading Automation
Adding automation to your aquarium can help you do less aquarium maintenance. Its also an excellent way to maintain your aquarium when youre out of town.
The most common automation addition is an automatic top off unit, or ATO. An ATO will keep the water level in your aquarium consistent. This will help the performance of your protein skimmer and prevent your pumps from running dry and burning out when youre out of town.
Maintaining your water level with an ATO will also keep your salinity stable. Remember, when water evaporates from your aquarium the salt is left behind, leading to increased salinity.
There are a variety of ATOs to choose from. An excellent choice is the
IceCap ATO EZ System. This ATO is affordable, reliable, and has small, discrete sensors that fit into the third chamber of the BioCube. To install the ATO, connect the sensors and pump to the control unit. Use the magnet to place the sensors right at the water level in the third chamber. Place the pump in a container of fresh water and rout the pumps hose back up to the aquarium and turn on the unit. The ATO will then maintain the tanks water level at the point where you placed the sensors. Just make sure to fill the reservoir with RO water when necessary. With a five gallon reservoir you could have enough top off water for a couple weeks.
One of the most common concerns people have when going out of town is feeding the fish. You can always have a friend or neighbor feed your fish, but often these helpers will overfeed the fish, leading to a dirty aquarium. An automatic feeder such as the
Hydor Ekomixo Fish Feeder will feed your fish a consistent amount of dry food on a daily basis. Feeders are also needed if you have a tank at work and you cant feed your fish on the weekend.
To use an auto feeder, fill the drum on the auto feeder with your choice of dry food. Then program the feeder according to the manual and test the feeder by having the feeder dump some food on to your hand. You can adjust the amount of food by opening or closing the door on the auto feeder.
If youre only gone for a short period of time, you can have the feeding door open at the top of the aquarium hood. For a more permanent solution you can cut a small hole in the canopy and set the auto feeder above the opening.
6. Common BioCube Problems
Algae
By far the most common problem all aquarists experience is unwanted algae. Algae is inevitable in an aquarium, but it can be managed. The first thing to consider when you see algae is that some algae is normal and unavoidable. Even the most skilled aquarists have algae in their tanks. Needing to clean the glass of a light algae film weekly is normal. Algae blooms within the first 3-6 months of setting up a new tank are normal. After about six months, when a tank has become established, if algae begins to cover rocks, sand, and corals, then you have a true problem that needs to be addressed.
The first thing to do when experiencing an algae problem is to understand that algae doesnt come from nowhere. Algae is growing in response to ideal algae growing conditions in the form of lots of light and lots of nutrients. Because corals need light we cant do much to reduce it, but you may consider shortening the period your lights are on to 8 hours and reducing the amount of time the BioCube moonlight is on.
There are many things you can do to reduce the amount of nutrients in the water. If you have algae, it is almost certain you have an excess of ammonia, nitrite, nitrate, or phosphate in your water. Because of this it is good to start by testing for these parameters to see if they are elevated. If your test comes back with elevated levels of any of these parameters you need to work on removing the excess nutrients by doing water changes.
More important than getting your nutrient levels down is keeping them at the proper levels so that algae doesnt grow back. There are two ways to reduce the nutrient levels in your aquarium in the long runreducing the inflow and increasing the outflow.
Every time you add food to your aquarium you are adding nutrients. If you find that your aquarium constantly has high nutrient levels and lots of algae you can reduce these problems by feeding your fish less. If you notice food falling to the bottom and being uneaten, then you are certainly feeding too much. Most aquarium fish can be fed every other day or every three days without problems, and this is often one of the most effective ways to control nutrients and the resulting algae in the long run. If you have lots of fish, big fish, or fish that require frequent feedings you may also need to consider that you have overstocked your tank and you may need to trade in some of the fish to your local fish store. You will be happier with fewer fish and a cleaner tank.
Most of us want as many fish as possible and we want to feed them as much as we want. Because of this a more common solution to algae and nutrient issues is increasing nutrient export. You can increase nutrient export by doing more water changes or upgrading your filtration (
see the Filtration Upgrades section). Because no one wants to do more work most aquarists will choose to upgrade their filtration. However, to overcome an immediate problem, temporarily increasing your water change schedule can make a big difference.
Reducing nutrients can starve existing algae and stop it from coming back, but it can take a long time for algae to die from starvation. In order to speed up the process you can remove algae manually or by biological means.
It is incredibly important when you manually remove algae that you do not simply scrub the algae off of surfaces but also remove the algae you have scrubbed off from the water. If you do not remove the algae from the water the algae can settle on new surfaces and regrow, or it can die and then provide nutrients for the remaining algae in the tank. To remove algae from the aquarium turn off all water flow before you scrub algae and immediately perform a water change after scrubbing. Direct your siphon to suck out all of the algae you just scrubbed off of the rocks. You can scrub the rocks with a tooth brush, and you may find it is easier to target the algae you have scrubbed by removing the gravel vac from your siphon tubing and simply using the tube alone to siphon out the water.
Biological algae removal comes in the form of the aquarium clean up crew (
see the Adding Invertebrates section). Snails, hermit crabs, sea slugs, and urchins can be excellent algae eaters. Make sure when you add a clean up crew to help solve an algae problem that you do so responsibly. When your tank has a lot of algae a lot of grazers can survive but once the algae is gone they might starve. Because of this either only add a small amount of grazers and rely on manual removal to get rid of most of the algae, or be ready to trade or give away some of your clean up crew once the tank is clean.
If you have performed all of the above solutions to starve out algae and remove algae from the tank, then you might consider using a chemical algae treatment. These treatments should only be used as a last resort. Our favorite is
ChemiClean, which will remove cyanobacteria (
aka red slime algae). This algae is particularly difficult to eliminate since it regrows quickly after manual removal and has no common predators. To use ChemiClean remove your protein skimmer's collection cup along with all chemical filtration and then add the recommended dose to the tank. After 48 hours perform a water change to remove the treatment and replace the skimmer cup and all chemical filtration media. It is common for the protein skimmer cup to overflow for a few days after the treatment. Generally, one treatment with ChemiClean will remove all cyanobacteria from the tank. If your out break is particularly bad you can repeat the treatment process.
Disease
Both corals and fish can get diseases. Before going over how to identify and treat common coral and fish disease we must state that the best way to avoid sick fish animals is to only add healthy animals. Make sure to ask your store what they do to prevent disease in their livestock and ensure that there are no obvious signs of disease when you purchase your animals (
see the Adding Livestock section).
Despite your best efforts at selecting healthy fish and corals, disease can still pop up. Rather than detail every kind of fish and coral disease we will categorize these disease together into groups and show the treatment for each.
Fish Diseases
1. External Parasites
External parasites include diseases such as ich, marine velvet, and brookneyla. These are the most common fish diseases you will experience. These infections look like spots or powder sprinkled on the fish. Luckily there are two medications that will reliably eliminate these sicknesses. Copper medications such as
Copper Power, Marine Copper Treatment and formaldehyde medications such as
Kordon Rid Ich Plus will remove these parasites. Unfortunately, both of these medications are extremely toxic to corals and invertebrates, so you will need to remove the sick fish from your tank for treatment if you have corals and invertebrates in your main tank.
2. Bacteria
Bacterial infections often happen after a fish has been wounded, just as cuts can get infected in humans. Bacterial infections can look like red coloring or swelling around wounds on a fish or cloudy or enlarged eyes known as pop eyes.
Aquarium Pharmaceuticals Melafix is a herbal antibacterial mediation that works well for helping these types of bacterial infections.
3. Internal Parasites
Internal parasites are hard to diagnose and rare. Internal parasites are mostly worms that live in the fishs digestive track and gills. Symptoms include harsh breathing, swollen or sunken bellies, discolored feces, and loss of appetite. There are not many commonly available medications for treating internal parasites and a pharmaceutical licenses is required to sell them, so
MarineAndReef.com does not carry them. Prasiquantel in the medication PraziPro is the most widely available antiworm medication for these types of infections.
Coral Diseases
1. Parasites
There are a whole host of parasites that eat corals including snails, nudibranchs, sea Spiders, flatworms, crabs, and copepods. You can Identify these parasites by looking for areas of eaten coral and then closely watching the coral at night when many of these parasites are most active. Once you visually identify the pest you can treat the pest by dipping the coral in a dip such as
Two Little Fishies Revive Coral Cleaner. Sometimes a single treatment will not be enough to eliminate the pest, so several dips over the course of several days may be required.
Another key to managing parasites is to add fish that prey on parasites. Wrasses can be excellent parasite eating fish. While many of the wrasses that eat parasites get too large for a BioCube, the sixline wrasse and yellow coris wrasse are good choices of fish that will eat coral parasites.
2. Bacteria
While rare, corals can get bacterial infections. The most common types are commonly referred to as brown jelly disease and vibrio infections. Brown jelly looks like a brown jelly that grows on a coral. And vibrio looks like white patches that can appear on mostly stony corals. We recommend using an iodine dip for treating bacterial infections. Revive contains iodine in it but we prefer to use
Brightwell Aquatic's Lugol's Solution for making an extra strong iodine dip. Simply remove the coral from the tank and swish it around in the dip mixture for the recommended time before returning the coral to the tank. Be careful when moving the coral to contain any infected tissue that may fall off of the coral. If this tissue or jelly lands on other corals it can cause the infection to spread. Siphon out the infected tissue before removing the coral for the dip treatment.
Running out of Space
Of all the problems to have the best one is running out of space. If your coral or fish begin to grow too large for your BioCube you are left with two optionsremoving some animals or upgrading to a larger tank.
If you decide to keep your BioCube, you can trade and coral fish back to your local fish store or with fellow hobbyists. Too large corals can also be trimmed back with bone cutters or a razor blade, and then glued onto frag plugs for trading. Use coral glue like
Two Little Fishies CorAffix to attach the coral pieces to frag plugs or smaller rocks. Once the corals have been attached and their wounds have healed you can trade them.
If you decide to upgrade to a larger tank you have many options. If you like the all-in-one nature of your BioCube, you may want to consider the larger all-in-one kits from
Red Sea. In the medium sized aquariums from these companies the aquariums include filtration built into the back of the aquarium similar to the BioCube. The larger sized aquariums from these companies use sump style filters that sit under the cabinet.
When you decide to upgrade from your BioCube to a new aquarium, it is best if the new aquarium can be in place and ready to fill with water before you move your livestock. When you move your animals from one tank to the other, try to save as much of the original water as possible as this contains beneficial bacteria and will cause less of a shock then if the animals are placed in all new water. You can use all of your existing rock as it'll contains large amounts of beneficial bacteria. You will however want to replace your sand, as sand can build up large amounts of waste over years of being in an aquarium.
Before you transfer your fish to the new tank, put the new tank in place and have it ready to be filled with water. You can add in your new rinsed sand and any new rock you will need. If the new aquarium is only slightly larger, start by adding water from your old tank to the aquarium and then add all of the fish, rock, and corals. You will not be able to completely fill the whole tank with water since the new tank is larger. Once the animals are transferred, and in the new saltwater to completely fill the tank. If your new tank is substantially larger, you may need to start with some fresh saltwater in the tank before transferring your animals. Do your best to match the temperature and salinity in the new tank to the old tank.
Once the tank is filled, you can turn on the new aquarium's equipment. When starting a new tank with the rock and livestock from the old tank, much of the initial cycling is avoided. You may experience a small cycle with some algae blooms, but it will be nowhere near as long as the initial cycle you experienced with your BioCube. Because of this, be ready to do more water changes than normal in the first month because the new tank will be more unstable than normal. Use
Brightwells Microbacter7 to ensure plenty of beneficial bacteria is present in the new aquarium.
Finally,
Enjoy Your BioCube!
Everyone at
MarineAndReef.com wishes you the greatest success with your BioCube. It may seem like a lot of work, but if you follow this guide, and if youre patient and organized, you will succeed. The Coralife BioCube is both a great way to beautify your home, school or office, and a fulfilling hobby. Its also a great way for families to connect. If you want your children to understand the ocean, biology, chemistry, and mechanics, aquariums are a great teaching tool.
Feel free to reach out to us with any questions you may have about your BioCube or other aquariums (480.491.5283 /
[email protected]).