• Free Shipping on all orders over $49 • $5.99 Flat Rate Shipping on orders under $49.

  • blue_solid_circle-white_bg-svg
  • Free Shipping on all orders over $49 • $5.99 Flat Rate Shipping on orders under $49.

Building A Budget REEF Aquarium: Step #8 The Rocks & Sand

So what is aquascaping anyway?


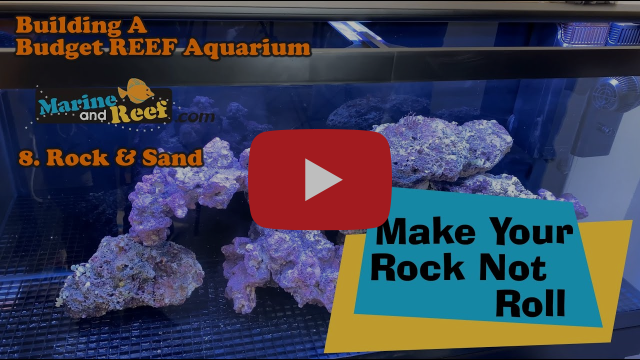
In Part #8 of our 30-episode series on Building A Budget REEF Aquarium, Jaron makes recommendations for adding rock (live & dry) and sand. He shows you how to properly choose and cement the rock, wash the sand, and get the tank clear.

Aquascaping in a reef aquarium begins with adding rock and sand to the tank. You have two options for rock. You can use dry rock, which is mined or made out of a plaster-type material. And you can use live rock, which has been in the ocean and then colonized with all the living organisms that live there. The advantage of live rock is that in addition to rock that you get to look at, you get all the natural bacteria living on that rock that help process waste in the tank. You also get a lot of microorganisms such as tiny starfish, sea sponges, snails, and seaweeds. All of these microorganisms break down waste in the tank, process it, start producing natural plankton, and create a natural reef environment.

Dry rock, which is just plain rock, is cheaper than live rock. But there are a lot of benefits to live rock. We're on a budget and we considered just using only dry rock. But we did a price comparison and we found out that the difference is not as extreme as you'd think. So, for this build, we picked out 20 pounds of
CaribSea LifeRock Shapes to go with the live rock. LifeRock Shapes are attractive-looking rocks that are purple-colored. It looks mature right away.

We ordered 37 pounds of aquaculture live rock from Florida. We could have saved a bit of money just going with only LifeRock dry rock, but there was only about a $40 saving going that route. But if I only went with the dry rock, I would buy a $20 bottled bacteria to start the tank. The live rock already has the bacteria, so we won't need to buy bacteria.

I found snails, seaweed, oysters, and sponges on the live rock. All of that is going to mature the tank much, much faster than if I just used dry rock. If you are a beginner we recommend you use some live rock. But mixing in some dry rock will save you some money.

For sand, we picked out the 40 pound size of
CaribSea Seafloor Special Grade Sand. This is a very popular reef aquarium sand. You may notice that we didn't go with live sand, and that's quite frankly because most live sand that I've seen just looks like sand in bacteria water, and usually it's a better value just to get that bacteria on the rock or in a bottled bacteria product. You generally don't get large sand-sifting organisms in live sand. You just kind of get bacteria water, so the value is not very great. This 40 pound size is perfect for this 55-gallon aquarium and it will give us a substrate about 1.5 inches deep.

To fuse our rock together I'm using
Two Little Fishies STIX Coralline Red Cement Mortar System, 5 lb. I've used this once before. This isn't a necessity, but this tank, in particular, is very tall, and one thing I worry about with tall tanks is once you build the rocks up, if they get knocked by a fish or a sea urchin or something, they could swing forward and then maybe scratch the front pane. A coral on top of a rock could fall face first and shatter or get damaged. By cementing the rocks together we'll have a sturdy rock structure that's going to stay in place and not cause rock avalanches.

Before we add the rocks we'll add some
Egg Crate. There are a couple of reasons you want to do this. If you put Egg Crate on the bottom it'll help distribute the weight. If you have a large rock, it's not going to have it all at one point. I've never personally had a problem with rock cracking a tank, but I've known some people putting very large rocks in tanks of thinner glass where the glass has cracked from dropping that big rock on it. Once we lay the Egg Crate down, and put the rocks on it, we're going to use the cement to really anchor those rocks exactly into one place, further stabilizing the structure and stopping things from falling over. So we picked out a two-foot by two-foot piece of Egg Crate. This tank is roughly four feet by one foot, so I just need to cut it in half and lay it down end to end. Then we'll work on putting our rock structure together.

Once we have the Egg Crate down on the bottom to distribute the weight of the rocks, and we've got the rocks in place, we'll want to cement everything in place. I arrange them to get an idea of what things are going to look like and then I go back and cement the joints together to get everything firmly in place. A couple of things to note are you can tell that the purple pieces are the LifeRock, and the live rocks also have the seaweed and other stuff on them. You can tell it's alive. I try to keep the live rock pieces towards the top and that's because a lot of the organisms on it are partially photosynthetic, so they do need some light on it. And then use the dry rock pieces on the bottom because there's nothing alive on them yet.

Around the edge of the rock, I keep enough room that a cleaner could go back there and scrub out those areas. We've also stacked the rock against the back wall. You're going to find a lot of people who recommend not doing that so that there's water flow behind it. However, this tank is just so proportionately narrow that if we didn't do that the rock would be very close to the front of the tank. So we've opted to put the rock in the back.

To cement the rock in place I use
Two Little Fishies STIX Cement. This cement ships in a little bucket to mix the cement up in. It comes in two parts. There's a liquid part that you need to add a little bit more water to. Mix the wet and dry to form the concrete. Once it starts forming you only have about 15 minutes to work with it before it gets hard, so it's good to mix up in small batches. You can adjust the consistency by adding a little bit more water or a little bit more of the powder. Just put the cement over the joints in the rock structure to keep everything firmly together.

The next step is to put the sand in the tank. You can just pour the sand into the tank. But if you do it's going to be cloudy for a long time. Washing the sand first will get rid of the dust. Just keep rinsing it in a bucket and pour out the water until it starts to run clear. For the next step, you can just get that big bucket of sand, lift it up, and dump it in, but I find that tends to make everything uneven. Instead, I use a cup to scoop up the sand and place it at the bottom.

Once you have the sand in the tank it's time to start filling the tank up with water. If there was no live rock or fish in the tank, you could mix the salt in the tank. Because we have live rock in this tank we mixed up the saltwater outside the tank. If you want to know how to do that see our previous video on
Making Salt Water.

I pour the salt water over the rocks themselves. That will keep the live rock moist, and it's also going to stop the water from disturbing the sand, which will limit the cloudiness in the water. Before starting up the pumps there are a couple of things to keep in mind. If you have a tank with a plastic rim like the one we're using in our videos, we recommend that you fill it so the water level is above the rim. That's going to look more attractive from the start, but it's also going to look more attractive in the long run because you will develop a hard water ring. If you have the level over that rim, you're not going to see it. It's going to look much better over time.

When we turn on all the equipment the tank will be very cloudy for a while. Don't worry, it's very normal. It often takes two to three days to clear up. To clear things up faster you could use a
Marineland Magnum 200 Polishing Internal Canister Filter. This is not required, and it's definitely not something I would buy if I were trying to save every last dollar. But this is excellent at getting particles out of the water.

When you turn on the pumps you are going to stir up all the particles. That's both normal and desirable. You want to get all the small sand particles into the water column so the filter and protein skimmer can trap the particles. When we started up this tank, after adding the sand and rock, the protein skimmer immediately started overflowing. That is completely normal for a new protein skimmer, especially a new protein skimmer with a lot of gunk in the water. There's just so much for it to pull out. We moved it to the lowest setting, and we still had the cup fill up in minutes. We'll need to dump it out a few times in the next hour. This is normal.

In our next video, we will cycle the tank.

More Info Product button block
  • Please contact us with any questions you have.

  • [email protected]

    We answer all emails through 3 PM the same day (M-F).

  • (480) 491-5283

    Monday-Friday 9:00 am to 11:00 am & 1:00 pm to 3:00 pm MT. We will return all phone calls through 3 PM the same day.

    Note: we do not have daylight savings time in Arizona

Empty Cart