Coralife BioCube 32 Aquarium Rock, Sand, and Salt Package Guide
Thank you for purchasing this
BioCube 32 Rock, Sand, and Salt Package. It has been developed to provide the proper amount of each product specifically for the
Coralife BioCube 32 Aquarium. Rock, sand and salt are three key components of a successful reef aquarium. This guide provides the guidelines for their proper use.
Your package includes:
-
CaribSea LifeRock Shapes, 15 pounds (RCS00381-15)
-
CaribSea Seafloor Special Grade Reef Sand, 12 pounds (RCS00020-12)
-
Two Little Fishies THREE-FIFTHS SIZE AccuraSea1 Artificial Saltwater Mix (Six packets to make approx. 30 gallons of saltwater) (RTL40901-30)
-
Two Little Fishies CorAffix Adhesive Gel, .7 oz (RTL44102)
-
Egg Crate, Black Styrene, 15" x 11.5" (RPP02448-12-15)
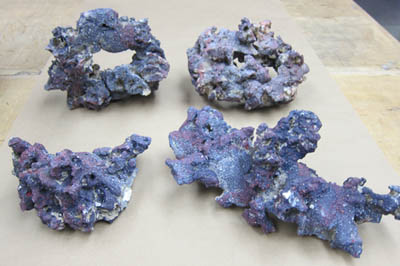
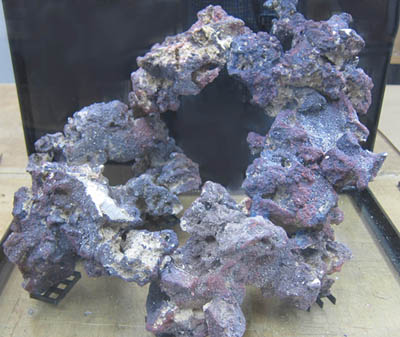
1) The Rock Structure (using the CaribSea LifeRock Shapes)The rock structure in a reef aquarium serves two main purposes. The first is to provide a structure to adhere corals to and the second is to provide a porous media for biological filtration.
There are several types of rock available—including “live rock” and various types of dry, and/or manmade rock. For this package we have chosen dry CaribSea LifeRock Shapes. This rock is attractive, the correct size, very easy to work with and is infused with spored bacteria for outstanding biological performance.
Please keep in mind that LifeRock is meant to make a framework that you will then fill in with corals (some that may be on a small piece of rock), and it is not intended to completely fill your BioCube. When you are done it should look very open with a lot of space around it. If you start with too much LifeRock the final display will end up looking like a reef pile instead of a nice reef structure with room for fish to swim in and around.
Before adding the LifeRock to your tank, we suggest that the tank be placed in its final resting place on a stand or other solid surface.
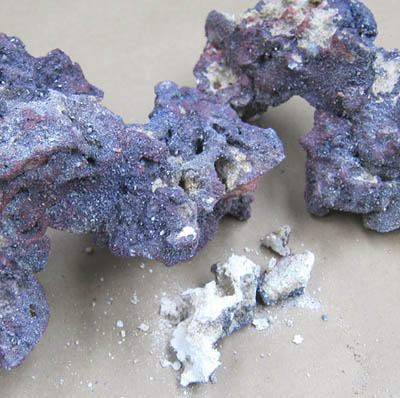
To start, lay out the pieces of LifeRock on a work surface or on the floor—preferably on thick paper as you will be using glue. If a piece of LifeRock has broken in shipping, do not worry. You will probably need to break the LifeRock up to fit your tank anyway. Keep any small fragments for later use.
Envision how you want to lay out the structure. Each LifeRock package is slightly different, so each structure will be individualized for your tank. You want an open structure. You also want as little of the LifeRock touching the bottom of your tank as possible to allow for good water flow for the removal of detritus. Typically, you want the LifeRock structure to be no more than two-thirds the height of your tank. Make sure that there is sufficient space between the LifeRock and the glass for cleaning. Remember, this is just the base structure. You will be layering it with corals.
It helps to envision what type of corals you want in your tank and plan accordingly. If you envision having a tall thin gorgonian, you will want to plan an opening for it. If you like corals that typically sit directly on the bottom, you will want to make sure that you have ample space at the bottom.
It is important for the LifeRock structure to be “rock solid.” You don’t want to start adding corals to your tank and have the structure crumble into a pile.
Use the Two Little Fishies CorAffix Adhesive Gel to glue together the LifeRock structure and small pieces of the Egg Crate to protect the bottom of the tank from sharp LifeRock. You can also brace and attach the LifeRock to the back wall if desired. When using a lot of glue in the open air, it may take several hours to set, so plan on this being more than a one day project.
Once you get a general idea of how you want your structure to look, start to lay it out on the paper. Break up LifeRock as needed with a hammer and brick chisel or large flat blade screwdriver. Dry fit the LifeRock into the desired structure. You may need to use other objects to brace the LifeRock at this point.
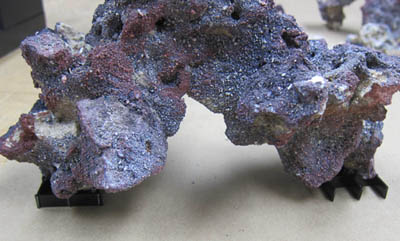
Cut small sections of the Egg Crate with a pair of diagonal cutting pliers (dikes). Place the pieces of Egg Crate under the LifeRock where it will make contact the bottom of the tank. If the LifeRock does not sit firmly on the egg crate, apply some glue to the rock where it touches the Egg Crate and brace it in place with some other LifeRocks or Egg Crate in the desired position (make sure that you do this over paper so that if the glue drips you do not glue your rock to the table). Let the glue set overnight before continuing.
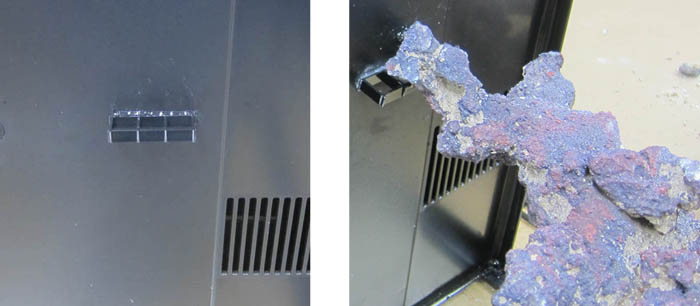
If you want a “bridge” of LifeRock coming from the back of the tank, or you need to brace part of a LifeRock to the back of the tank, you can glue a few cells of the Egg Crate to the back of the tank. If you hold the Egg Crate in place for a few minutes it will stay in place while the glue sets up, but allow it to set up overnight before applying any pressure. You can then use this to brace the LifeRock when you go to glue it in place.
Once you have the LifeRock pieces ready, you can assemble the structure in the tank. You may need to put a couple of pieces of LifeRock in at a time and allow the glue to set overnight before continuing. Take your time doing this to insure that you have a solid structure.
When you are finished go back with the glue and put a drop or two everywhere that one piece of LifeRock makes contact with another piece of LifeRock, or any place where LifeRock makes contact with the back wall of the BioCube. If you need to, you can use some small pieces of the broken LifeRock to fill in gaps.
Any extra glue should be kept for gluing corals onto the LifeRock.
For more guidance with creating a rock structure, adding sand, filling the tank and adding salt, you might want to watch the How to Set Up a BioCube Aquarium Video.2) Cleaning and Adding the SandFor the most part, the sand is in the tank to make a visually pleasing bottom for your display. There are some animals that require specific sand beds, but that is beyond the scope of this article.
Trends in the past have gone from very deep sand beds to bare bottom tanks. The CaribSea Seafloor Special Grade Reef Sand provided in this package is meant to provide a bed deep enough to cover the bottom, but no so deep it traps a lot of detritus.
The Seafloor Sand will need rinsing before using. One of the easiest ways to do this is put it in a 5 gallon bucket and run a garden hose in the bucket while mixing the Sand around with your hand unit the water runs mostly clear. Then drain as much water from the bucket as you can.
Transfer the Sand to the bottom of your BioCube. Don’t worry about leveling it out at this point.
3) Filling the Tank and Adding the Salt MixOne of the nice benefits of using a dry rock is you do not need to pre mix the initial saltwater that will be used in the tank.
Before adding water to your BioCube, make sure that you have removed the power cord from the pump compartment in the back of your tank and removed the BioCube Filter Cartridge from its wrapping. Be sure to rinse the BioCube Filter Cartridge before putting it back in the tank.
Fill the tank with purified water treated by reverses osmosis (and ideally with DI resin as well). This water is available at Water and Ice Stores, vending machines outside grocery stores and local fish stores. Or, you can purchase an RO/DI set up and prepare your own water.
It will take approximately 25 gallons of water to fill the tank. The tank is “full” when the level is ½” below the bottom of the black trim at the top of the tank in the front and back compartments. When you start the pump the level in the back will go down and the level in the front will rise.
Plug the water pump in to start the flow (make sure there is a “drip Loop” in the power cord). We suggest using a GFCI protected outlet for safety. If you do not have a GFCI protected outlet or power strip, the a GFCI adapter is an easy way of adding one.
Open the six Two Little Fishies AccuraSea1 Artificial Saltwater Mix packets and sprinkle evenly into the tank water.Using your hand, or a long handled scraping tool such as a
Continuum Aquatics Scraper (using the plastic blade), gently smooth out the sand into a somewhat even layer.
Allow the salt to dissolve overnight and then test the specific gravity with a
hydrometer or refractometer. The ideal specific gravity is 1.025 to 1.026. If the level is too high, remove a little of the saltwater and replace it with purified water a little at a time until you reach 1.026.
Congratulations, you now have a pleasing solid rock structure to work with and are ready to cycle your tank! For help cycling your tank you can refer to the
Coralife LED BioCube Aquarium Setup Guide or view the
How To Cycle A BioCube Aquarium Video.