Aquarium Water Changes: Making It Simple
Water changes are essential for maintaining a healthy and beautiful aquarium. Aquarists often dread the unpleasant task of water changes, but they can be made simple and easy. Here are our recommended water change methods for a fast, easy, and effective water changes. We have different methods for saltwater and for freshwater aquariums and different methods for small aquariums and for large aquariums.
You should change a minimum of 30% of your water at least once a month. Keep in mind that when doing water changes you can do them every week, every two weeks or once a month. Just do a
total of 30% a month.
Small Saltwater Aquariums (less than 40 gallons)
Start with two equal sized containers—the
Seachem Just Add Water 5 Gallon Water Jug TWO PACK work well— , and fill one with RO/DI water. The second jug will be used to collect the water removed from the aquarium. As the jugs are equal size it will be easy to determine that the amount of water removed is equal to the amount of water returned to the aquarium.
NOTE: You won’t be able to use the 5 Gallon Water Jug for doing a 30% water change for a 17 gallon plus tank all at once. However, if you are doing weekly water changes then the 5 Gallon Water Jug will work fine for tanks up to 60 gallons. Doing a bit more than 30% is also fine. We do weekly 5 Gallon water changes on our 40 gallon tank, which is 50% every month.
You can purchase water from your local fish store or make your own using an RO/DI unit. We recommend the
AquaticLife Twist-In Compact 4-Stage RO/DI Unit.
Add salt to the RO/DI water in your mixing container. We recommend
Two Little Fishies AccuraSea1 Artificial Saltwater Mix. This 50 gallon size has ten packets of salt that each make 5 gallons of saltwater. These five gallon packets are the perfect size for the
Seachem Just Add Water 5 Gallon Water Jug.
Place a small pump like a
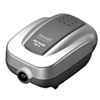
Lifegard Aquatics Quiet One Pro Model 400 Pump in the jug and plug it in.
Wait for the salt to mix. Different salt manufacturers have different recommendations for how long to mix salt. We recommend eight hours. Starting the pump before you head off to a full day of work or before bed will ensure the water is ready when you return.
We have a package that combines the recommended products called the
Two Little Fishies Small Saltwater Aquarium Salt Mixing & Water Change Package. It combines the
Seachem Just Add Water 5 Gallon Water Jug TWO PACK,
Lifegard Aquatics Quiet One Pro Model 400 Pump and the
Two Little Fishies AccuraSea1 Artificial Saltwater Mix.
Use a
hydrometer or
refractometer to confirm the salinity of your new saltwater, and adjust if needed. We use and recommend the
MarineAndReef.com Reefractometer and the
Coralife Deep Six Hydrometer. Refractometers are more expensive, but they are a bit more accurate and will last much longer than hydrometers.
Turn off all of the aquarium equipment except the light.
Use a gravel vac like a
Python 25 ft. No Spill Clean & Fill Gravel Vac or a
Python Extended Length Gravel Tube to drain the dirty tank water into your empty jug (
or jugs). The
Python Squeeze Stressless Siphon Starter can make starting the siphon much easier. We sell these two products together at a discount as the
Python 25 ft. No Spill Clean & Fill and Squeeze Stressless Siphon Starter Package.
Add RO/DI with correct specific gravity back to your aquarium.
Turn back on your aquarium equipment.
Large Saltwater Aquariums (over 40 gallons)
With large aquariums a 30% water change can seem daunting. But if you use the best practice methods and technologies (
which don’t really cost much), water changes can be done quite easily.
It might seem hard to find a container big enough for the large amount of water, but we have found that two equal-sized trash cans do the trick. One advantage of using two equal sized cans is it’s easy to determine that the amount of water removed is equal to the amount of water added. Our favorites are the 30 or 44 gallon trash cans with wheels that can be purchased at your local hardware store. Alternatively, you can use your gravel vac to have the water transported directly to a sink drain. However, with this method it is harder to determine how much water has been removed from the aquarium. With wheeled garbage cans it is also convenient and easier to transport. Just push the garbage can over to the sink, and pump the water from the garbage can into the sink with an aquarium water pump.
But we’re getting ahead of ourselves. Before removing water, you want to have your saltwater ready to go. To do this, fill one of the trash cans with RO/DI water. When you are doing water changes of 30 or more gallons it will be significantly easier to produce your own water rather than purchasing it. We recommend using the
SpectraPure Line Pressure Reverse Osmosis/Deionization Five-Stage MaxCap Manual Flush 180 GPD System. These systems have high quality membranes and cartridges that are long lasting.
The AquaticLife Float Valve Kit for RO & RO/DI Systems will automatically shut off the RO System when the trash can is filled.
Add salt to the RO/DI water in your mixing container. We have several types of
salt. They’re all good. We just recommend you use the entire container or bag as when you use partials there may be some unevenness in the mix that will throw off the salinity or amount of trace elements.
Place a small pump like a
Lifegard Aquatics Quiet One Pro Model 400 in the garbage can and plug it in. Run for approximately eight hours.
Use a
hydrometer or
refractometer to confirm the salinity of your new saltwater, and adjust if needed. We use and recommend the
MarineAndReef.com Reefractometer and the
Coralife Deep Six Hydrometer. Refractometers are more expensive, but they are a bit more accurate and will last much longer than hydrometers.
When your salt is ready and you are ready to do the water change, turn off all of the aquarium equipment except for the lighting.
Roll both trash cans over to the aquarium and use a
gravel vac to clean the substrate and drain dirty water into the empty trash can.
When putting the fresh salt water back into the aquarium you can use the same pump you used to mix the salt water. Using the
Python Hook and some tubing to pump the fresh saltwater water back into the aquarium will make life easier as you won’t need to stand there with hose in hand for the duration.
Turn your aquarium equipment back on.
Transfer the pump and hose to the garbage can with the dirty water and use it to pump the water down your drain.
Small Freshwater Aquariums
Turn off all of the aquarium equipment, except the lighting.
Use a gravel vac such as a
Python 25 ft. No Spill Clean & Fill Gravel Vac (or
50 ft. Gravel Vac), to drain the aquarium’s dirty water directly down your sink drain or
Python Extended Length Gravel Tube to drain the tank’s water into a bucket or jug. The
Seachem Just Add Water 5 Gallon Water Jug would be a great option for this. Using the
Python Squeeze Stressless Siphon Starter can make starting the siphon much easier.
Dump out the dirty water and refill the container with tap water. Make sure that the temperature is approximately the same as the aquarium by simply feeling the temperature with your hands.
Add dechlorinator such as
Seachem Prime to the water. Then add the water back to the aquarium.
Turn back on your aquarium equipment.
Large Freshwater Aquariums
Turn off all of the aquarium equipment, except the lighting.
Use a gravel vac such as a
Python 25 ft. No Spill Clean & Fill Gravel Vac (or
50 ft. Gravel Vac), to drain the aquarium’s dirty water directly down your sink drain or
Python Extended Length Gravel Tube to drain the tank’s water into a bucket or jug. The
Seachem Just Add Water 5 Gallon Water Jug would be a great option for this. Using the
Python Squeeze Stressless Siphon Starter can make starting the siphon much easier.
Add a sufficient amount of dechlorinator to the aquarium, equivalent to the amount of water you took out. We recommend
Seachem Prime.
Turn the valve on your water changer and turn on your sink to start refilling you aquarium. Feel the water output to ensure that it is approximately equal in temperature to the tank’s water.
Turn back on your aquarium equipment.


