Aquarium UV Sterilizer
Troubleshooting Guide

The typical first step when a UV does not appear to be working is to replace the bulb. This is not a bad first step, especially if itís been a year or more since the bulb was last replaced. However, it is not always the most logical first step and quite often it doesnít solve the problem.
Here is a recommended diagnostic troubleshooting guide for when you suspect your UV of not working properly.
1) Does the UV Turn On?
If the lamp does not turn on, then the problem is either a bad lamp, bad wiring, or a bad ballast.
NOTE: When determining if a lamp is working, never look at the UV lamp directly while it is on as it will burn your pupils. Use the clear portion of your sterilizer to tell whether the light is on or not.
First possibility: The lamp is bad
UV lamps need to be replaced yearly as by the end of the year they might have lost enough intensity to no longer be effective, but they should light up for several years. If your lamp does not turn on, and it is old, it is a wise first step to try a replacement lamp as you will need a new lamp anyway (see
UV Sterilizer Replacement Lamp section). However, when you install the new lamp, if that lamp does not light up, then there is a good chance the problem is not the lamp. Very rarely are new lamps defective. Sometimes customers tell us that they believe a new lamp must be bad because itís black inside and the lamp rattles. This is normal. The most popular UV manufacturers test
every lamp before they leave the factory (
and this results in black smudges inside the lamp). The rattling is not an indication of a bad lamp as UV lamps have mercury balls inside that help to produce the UV light.
Pro Tip: When you replace a UV lamp, and the old lamp still works, itís a good idea to keep the old lamp until the next change. This way, if the new lamp doesnít work, but the old lamp works, you know the problem is something other than the lamp.
If the lamp is good, then the problem is either the wiring or the ballast
Wiring
Bad wiring is usually obvious from visual inspection. If you notice loose, discolored, or broken wires or connectors you should replace them.
Ballast
The ballast or transformer for a UV sterilizer usually lasts around 5 years. If you try a new lamp and the wiring looks intact but your lamp still wonít light up, then you most likely need a new ballast. Ballasts ensure that UV lamps receive the correct amount of power and are necessary for a UV to function. We carry ballasts for most of the UVs we sell in the
UV Sterilizer Replacement Parts section.
If there is any water inside of the quartz sleeve due to a broken quartz sleeve or bad gasket then that is probably the problem. The water may have destroyed the lamp and the ballast. After replacing the quartz sleeve and gasket as needed (
visit UV Sterilizer Replacement Parts for replacements), and making sure everything is dry, you can turn on the UV. If it doesnít work, you will need to replace the ballast or the bulb or both.
2) Is There Adequate Water Flow?
If water is going through the UV Sterilizer, and the bulb is newish and lighting up, but you are not killing the free-floating algae, then there is likely a problem with your pump or plumbing. First, make sure the pump is not broken and your plumbing is not clogged.
If there is water flow, and it appears the UV is still not doing the job, then it may be an issue of too much or too little water flow. Without the correct amount of water flow going through the sterilizer, then the sterilizer will not work properly. UV sterilizers require a very specific flow rate for optimal performance.
Check the sterilizerís recommended flow rate in the manual and then check your pump. Too much flow through the sterilizer is more common than too little. Try to make sure the pump's GPH is close to the required GPH for your sterilizer. But keep in mind that the nominal flow and actual flow will never be the same due to head pressure, If you want a more exact measurement you can place the outlet hose from your sterilizer in a 1-gallon bucket and measure how long it takes to fill it, then calculate the flow rate. Or you can use the
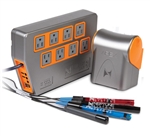
Neptune Systems FMK Flow Monitoring Kit to get an exact digital readout of the flow rate along with alerts when the flow rate changes.
3) Everything Appears To Be Working . . . But Itís Not Working
In some cases the bulb lights up, the bulb is new, and there is adequate water flow, but you are still not getting the desired result. It could be because you expect your UV sterilizer to do something it is not designed to do. Keep this in mind:
-UV sterilizers only sterilize whatever passes through the UV sterilizer. With algae, this is limited to free-floating algae. A sterilizer will not destroy algae growing on your rocks or substrate or clinging to the walls of your aquarium unless it is dislodged and passed through the sterilizer. To get algae into your sterilizer it helps to clean the glass with an algae magnet.
-Itís the same with fish diseases. To kill a parasite it must pass through the sterilizer. UV sterilizers will not cure a sick fish. A UV will only help prevent the transmission of disease from a sick fish to the other fish in an aquarium.
Avoiding Future Problems
Itís always best to prevent future problems rather than waiting for them to occur. Here are some best practices:
- Replace gaskets/o-rings. UV failure often occurs when the UV sterilizer leaks and water gets to the bulb or the power supply electrical connection. We have sections on our Web site for UV Sterilizer Replacement Parts, and we have replacement gaskets/o-rings for the higher-end units. Check out the Lifegard Aquatics Pro-MAX UV Replacement Parts, Lifegard Aquatics QL/AquaStep UV Replacement Parts, Emperor Aquatics UV Replacement Parts, and Aqua Ultraviolet Replacement Parts for gasket/o-rings for their UV products.
- As mentioned before, keep an old, working bulb around. That way if your UV fails to light up you will have a working bulb you can use to test the power supply.
- Replace bulbs according to the manufacturerís recommendations. This is typically at least once a year. However, if you are using your UV less than 100% of the time (with ponds UVs are often not run in the winter), then your bulbs will last longer.
- At some point, it becomes hard to clean the quartz sleeve. If light does not pass through the quartz sleeve they are less efficient. We carry quartz sleeves for the UVs we sell in the UV Sterilizer Replacement Parts section.
- Any time you change the amount of flow to your UV by changing the pump or plumbing you need to make sure you are still getting the recommended flow rate to your UV.
Final Words
UV sterilizers are pretty simple devices, and they are the most effective way to destroy free-floating algae and parasites. We are not trying to convince you otherwise. Just always keep in mind these three things and you will have more practical knowledge about UV sterilizers than 99% of aquarists.
- When you install a new bulb and it doesn't light up, the problem is rarely the new bulb. This is especially true if the old bulb isn't lighting up.
- If you replace your quartz sleeve gasket every year, leakage will be very unlikely.
- Pay close attention to the flow rate. Imagine that the inside of your UV sterilizer is an oven. The wattage is the temperature and the flow rate is the equivalent of cooking time. When a UV requires 300 GPH it is equivalent to a baking recipe telling you the cooking time. We all know what happens when you bake something for too little or too longóyou don't get the desired result. It's the same with a UV.


