Canister Filter Troubleshooting
How to Troubleshoot and Preempt Canister Filter Problems
Help! My Filter Is Leaking
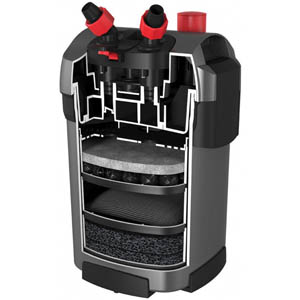
Canister filters are more prone to leaking than any other type of filter. If your filter is leaking, you need to first find out where the filter is leaking from. Occasionally a leak occurs because a filter body, motorhead (
top section with pump), or hose connector is cracked. But by far the most common location for a leak is the main filter o-ring.
We carry a wide variety of replacement canister filter o-rings in our
Aquarium Filter Replacement Parts section. Even if your filter is not leaking, having an extra main o-ring on hand is a good idea. Having to shut down your filter while you wait for an o-ring to arrive can be costly. OASE calls it the gasket. Fluval calls it the Motor Seal Ring. We carry parts for Fluval, JBJ (EFU Reaction), Lifegard, OASE, Marineland, Nu-Clear, and Penn-Plax Canister Filters. See:
Aquarium Filter Replacement Parts.
Canister filters also have other o-rings where leaks can occur. Some common places with o-rings include the quick disconnect valves and the priming button. If you can identify where a leak is coming from, swapping out the o-ring should fix the problem.
Itís also a good practice to replace your o-ring as preventative maintenance. Spending a few dollars today on a new o-ring is a lot cheaper than having your carpet cleaned or hardwood floors re-finished because of a filter leak. O-rings should be replaced every year or at least every other year. New o-rings should be lubricated with silicone lubricant before installing. You can also extend the life of your o-rings by applying
Inland Seas Super Lube Silicone Lube, or
Lifegard Aquatics Silicone O-Ring Lubricant every time you open up your filter for maintenance.
Help! My Filter Isnít Pumping Any Water
If your filter isnít pumping water, the first thing to check is whether or not the impeller in the motor (pump) is moving. After turning off the filter, closing any valves, and disconnecting the hoses (using the quick disconnect if there is one), open up the filter and locate the filter impeller. This is usually at the top of the filter motor head. Once you have located the impeller, remove it and inspect it. If the impeller is broken, worn, or swollen then replace the impeller. Make sure to also check the impeller shaft and impeller cover. If either of these is broken then they should be replaced.
Once you have confirmed that the impeller is intact, very briefly turn the filter on with the motor head removed. If you can see that the impeller starts to turn then you know the motor is working. If the motor still does not turn then your main motor head is bad and needs to be replaced. We carry replacement motors, impellers, impeller covers, and impeller shafts (also called motorheads or pumps) in the
Aquarium Filter Replacement Parts section.
Once you know the filter motor works, reassemble the filter but leave the filter hoses disconnected. The next step is to check to make sure that the filter hoses are primed. Put a bucket below the aquarium and place the filter hoses in the bucket. Open the quick disconnect valves from the hoses. Water should freely flow through the hoses and into the bucket. If water does not flow through the hoses, the hoses either are still obstructed or need to be primed.
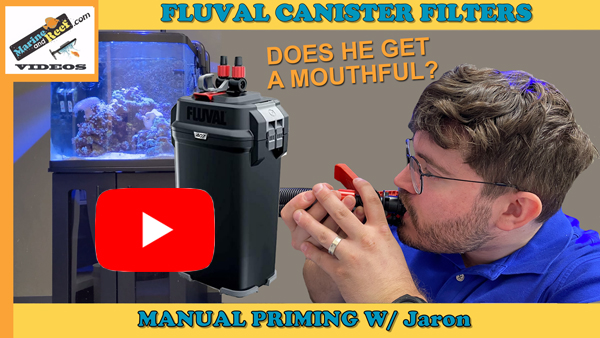
If youíre certain the hose line is clear, but the water is not flowing, youíll need to prime (to prime is to fill the hose lines with water) the filter. Many filters have a built-in priming button. If the filter does have a prime button, reconnect the hoses and use the prime feature. If not, open the valve on the hose and suck on the valve to start a siphon (better dirty aquarium water than gasoline!). Check out our
You Tube Manual Priming Canister Filter Video for detailed instructions. Let the water pour into the bucket to confirm that the siphon is complete. Once both lines are primed, close the valves, re-connect them to the filter, open the valves, and plug in the filter.
Help! My Filter is Pumping Very Slowly
If your filter is pumping water slowly, then there is either a problem with the impeller, an obstruction in the filter hoses or dirty filter pads.
Filter Pads
If your filter pads and media are clogged there will be less water flow. The more detritus in the filter the harder the pump must work to push water through the media and the less water returned to the tank.
How often a filter pad should be cleaned and replaced is a function of your particular filter, the size of your aquarium and your bio-load. You definitely want to clean your filter pads at least monthly. Information on how often you change your filter pads and other media will be in your canister filter manual. We carry replacement media in the Aquarium Filter Replacement Media section.
Impeller Problems
Impeller problems are not always obvious. If the shaft or glue joint is broken, then the impeller will not turn and there will be zero water movement. If there is some water flow, the problem could be a build-up of material on the impeller. Clean it with Citric Acid Pump Cleaner and see if that helps. Other problems could be some of the impeller blades have broken off or that the impeller or impeller magnet has swelled (this can happen if the pump runs dry). If there are broken blades or a swelled magnet youíll need to replace the impeller.
Filter Hose Problems
If the impeller appears to be clean and intact, the problem is likely an obstruction in the hoses. Start by removing the filter hoses and cleaning or replacing them. You can clean the hoses using an OASE Spiral Brush, Fluval Pull-Thru Hose Brush or a Two Little Fishies MagFox Magnetic Hose Cleaning Brush. The Mag Fox is excellent for extra long clear hoses. Because tubing is relatively cheap it may be easier to simply replace the hoses. We carry replacement hose in the Aquarium Filter Replacement Parts section.










 Canister filters are more prone to leaking than any other type of filter. If your filter is leaking, you need to first find out where the filter is leaking from. Occasionally a leak occurs because a filter body, motorhead (top section with pump), or hose connector is cracked. But by far the most common location for a leak is the main filter o-ring.