![]() When Should I Replace My UV Sterilizer Lamp?
When Should I Replace My UV Sterilizer Lamp?
(and what other maintenance is required?)
UV sterilizer bulbs don’t last forever. They eventually need to be replaced. But how often? How do you switch out the bulb? And what else do you need to do to maintain a UV sterilizer? We've got the answers.
How often should I replace my UV lamp?Modern UV lamps work by heating up and burning elements placed inside of the lamp, and this includes a small amount of mercury. This is why when you purchase a new lamp there is often a small ball rolling around inside the lamp. As the lamp runs this will get vaporized. Eventually, all of these elements are burned up and the lamp will still turn on and produce light, but it is no longer producing as much light in the UV spectrum needed to kill and sterilize. Across brands, all modern UV lamps are rated for one year of continuous use. At this point, the lamp has burned up enough of the original elements that the performance of the lamp is suffering even if the lamp is still producing light.
If you run your UV continually then you should replace the lamp once per year to ensure proper functioning. If you only run your UV seasonally, as is common with ponds, or only at night with some reef aquariums, then you can extend the time between replacements to when you have reached one year of actual use. If you only use your UV half the time, replacing the bulb every other year will suffice.
If remembering how long you have had the unit on is too hard, consider a
Lifegard Pro-Max UV with an Amalgam ballast. The Amalgam ballast will automatically count down the days until your next bulb replacement and sound an audible alert once the bulb needs replacement.
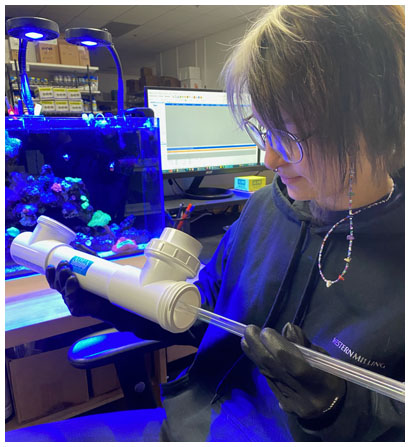
How do I replace a UV lamp?Most UV sterilizers use a long fluorescent lamp that is placed inside of a quartz sleeve. The quartz sleeve stops water from touching the bulb and electrocuting your fish while allowing UV light to pass through and sterilize the water.
There should be two nuts on one end of your unit. One seals the sleeve to the unit body and one seals the lamp inside of the sleeve. To get to the lamp, unplug the unit’s power and then unscrew the nut sealing the lamp inside of the sleeve. The lamp should slide out. You can then disconnect the lamp from the transformer and replace it with a fresh lamp.
We recommend saving one bad lamp. Sometimes customers experience a failure where their UV sterilizer will not turn on. Sometimes this means the lamp is bad and sometimes this can be the transformer. A good way to test is to put your old bulb back into the unit and see if it lights up. If the unit turns on, then you know the bulb is bad. If the unit still does not turn on, the transformer is most likely bad.
What else do I need to do to maintain my UV sterilizer?When you replace your UV lamp, there are several other tasks we recommend doing at the same time to ensure that your unit is functioning well and will last for many years.
Cleaning your quartz sleeveThe quartz sleeve that the UV lamp sits in can get calcium and mineral build-up on its surface. This is because the heat from the lamp attracts the precipitation (
similar to how a water heater can get a lot of mineral build up inside of it). To clean, first, turn off the flow through your UV sterilizer, unplug the lamp, and drain out the water. You can then remove the sleeve by loosening the sleeve nut and then sliding the quartz sleeve out. Look at the sleeve to see if there is excessive mineral build-up on it. You can use some
Inland Seas Citric Acid and a sponge to try and scrub off the buildup or you can replace the sleeve with a fresh one if it looks too difficult to clean. Quarts sleeves are very fragile and easy to damage so be extra careful. It is a good idea to have an extra sleeve on hand in case you accidentally damage one.
Inspecting the gasketsWhile you have your unit opened up, inspect all of the rubber gaskets. These can get brittle over time and eventually fail—leading to a leak. Use
Inland Seas Super Lube Silicone Lube to help the gaskets last longer. You will also want to periodically replace the gaskets as they wear out. If one gasket is bad then the rest will follow soon to it is best to swap them all at once. We sell
gaskets for all of the UV sterilizers we sell.
Inspect the bodyFinally, inspect the body of the unit. UV light slowly destroys everything including the plastic body of your UV sterilizer. Most high-quality UV sterilizer bodies will last at least 10 years but if the body feels brittle or squishy it may need to be replaced. With some brands, you will simply need to buy a new unit. With Aqua Ultraviolet you can request a new body from the manufacturer directly. Lifegard Aquatics takes a different approach. There is a
plastic sleeve inside of their UV sterilizers that wears out before the body of the unit. If this sleeve looks warped or brittle, then swap it for a new one. This
"sacrificial sleeve" makes Lifegard UV sterilizers some of the longest-lasting units on the market, with some customers reporting over two decades of use from the original body! But this sacrificial sleeve only does its job if you replace it, so make sure to inspect your unit and swap the sleeve when needed.
MarineAndReef.com carries UV lamps, quartz sleeves, gaskets, Oring lube, and Lifegard protective sleeves for multiple brands of UV sterilizers.


 When Should I Replace My