Coralife LED BioCube FRESHWATER Aquarium Setup Guide
w/ Info on Maintenance, Upgrades & Common Problems
NOTE: We also have a Coralife LED BioCube Saltwater Aquarium Setup Guide. 1. Getting StartedFor accompaniment to this article, view the
How To Set Up A BioCube Aquarium Video. Though the video focuses on setting up the BioCube as a saltwater aquarium, most of the video will apply to setting up a BioCube as a freshwater aquarium.
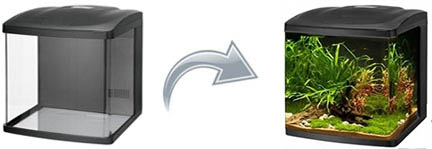
You just received your new
Coralife LED BioCube Size 32 or
Size 16 Aquarium. Now what? Setting up your BioCube is actually a simple process if you’re patient and follow these seven steps.
NOTE: If you are setting up your BioCube as a reef aquarium or saltwater fish-only aquarium please visit the
Coralife LED BioCube Saltwater Aquarium Setup Guide.
Step #1 Position Your BioCubeWhere should you put your BioCube? It should be placed close to an electrical outlet and out of direct sunlight. Use either a GFCI outlet or power strip with a built in GFCI. A third option is use a GFCI adapter. Place your BioCube on a flat, level surface that can support its full weight. Do not underestimate how much a full BioCube can weigh. The BioCube Size 32 is easily over 300 pounds when full.
You can use the
Coralife BioCube Size 16 Aquarium Stand or
Coralife BioCube Size 32 Aquarium Stand. These Stands are designed specifically for BioCubes. We've posted the
How To Build a BioCube 32 Stand Video on YouTube to help with assembly.
It’s a good idea to leave a couple inches between the aquarium and the wall to route cords and allow access to the back of the aquarium if needed. Remember, once you fill your aquarium with water, moving the aquarium will only be possible if you first drain the tank.
Step #2 The Pump and Filter Cartridge![]()
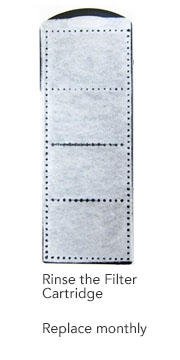
Once the aquarium is in place, pull the power cord connected to the main return pump out of the opening in the canopy located directly above the pump. Do not plug the pump in yet. Open the bag containing the BioCube Filter Cartridge and rinse it in your sink with tap water. Place the cartridge on top of the media rack in the middle chamber.
The
BioCube Filter Cartridge should be replaced monthly. Save money by purchasing a multi-pack, such as the
BioCube Filter Cartridge 12-Pack.
Step #3 Substrate and HardscapeBefore filling the tank with water, add substrate and hardscape. Hardscape consists of rocks and wood decorations. In planted aquariums natural rock and wood are often selected and locally due to the high shipping costs. When selecting rock, do not choose any rock that looks metallic or is known to contain metal. Do not choose any rocks that have calcium, such as limestone. When choosing wood, make sure that sap is dry. Some woods have toxins that leach into the water and can kill fish. Some good wood types include Malaysian driftwood, spider wood, and manzanita wood.
Before adding rocks make sure that the rocks have been cleaned of dirt and debris by spraying them with a hose outside. Wood will leach discoloring compounds called tannins into the aquarium water giving the tank an ugly brown color. Soaking the wood for a few weeks to a month before putting it in your tank can help remove these tannins before you place the wood in your tank. If you want to avoid the concerns associated with natural decorations you can purchase artificial decorations that are safe for aquariums and don’t need any cleaning.
![]()
Once you have added your hardscape to the tank you can add your substrate. Adding the substrate after your hardscape will help to anchor your hardscape in place. Live plants do best with a soil like substrate that allows plant roots to easily penetrate the substrate and absorb nutrients. We recommend
Seachem Flourite Clay Substrate. One 7.7 lb bag of Fluorite will work for the BioCube 16 and two should be used for the BioCube 32.
Your substrate needs to be rinsed to avoid excessive cloudiness once the tank is filled with water. Pour the substrate into a bucket, then push a hose to the bottom of the bucket and turn the hose on. Stir gently with the end of the hose and let the water overflow from the bucket until all of the brown cloudiness has poured out of the bucket. Once the water is running clear, dump out the remaining water and add the substrate to the aquarium.
Try to avoid placing rocks very close to the viewing panels so that you can easily clean the glass in the future. It helps to use aquarium glue or an underwater epoxy to hold rocks together and make sure the structure is stable. We sell a number of
adhesives for gluing together the rock and attaching plants to the rock and wood.
Step #4 Adding Plants![]()
In a planted aquarium it is best to add most of your desired plants right away. With lots of light and a nutrient rich substrate algae will grow quickly if there are no plants using up the nutrients and light energy.
When selecting plants look for plants that have a crisp green color and are free of blemishes or discoloration. Choose plants that are truly aquatic and have been grown underwater. Many aquatic plants are grown immersed with only their roots in water. These plants can be difficult to transition to a completely submerged environment. There are also some plants that are easier to care for than others, including anubais, java fern, mosses, cryptocorynes, and sword plants. These plants are all good choices for beginners.
Once you have your plants you can add them to the aquarium while the tank is still dry. Use
Plant Tweezers to push rooting plants into the aquarium substrate. Some plants, such as mosses, Java ferns, and anubais grow naturally on rock and wood. You can attach these plants to surfaces using
Two Little Fishies CorAffix aquarium glue. You don’t need to rush the planting process as the water plants can survive out of the water for a day or more. Once all the plants are in place you are ready to add water.
Step #5 Adding WaterWhen adding water to an aquarium you need to make sure the water is safe. The most toxic substance in tap water is chlorine. Chlorine is designed to sterilize water and kill all life. This is obviously bad for your fish. Treating tap water with a water conditioner such as
Seachem Prime (
before pouring it into the tank) will remove harmful chlorine.
In addition to chlorine, there may be other harmful compounds in your water. Because everyone’s water is different we can’t tell you what may be in your water. For the highest quality water it is best to start with RO water. You can purchase RO water from your local fish store or grocery store, or you can make it yourself using an
RO System. We recommend the
AquaticLife RO Buddie 50 GPD Reverse Osmosis System. Because RO water is so pure it is good to add beneficial minerals back to the water before adding the water to your. We recommend
Brightwell Aquatics Remineraliz.
Once you have your water ready you can pour it into the aquarium. We recommend you direct the water to fall on top of the rocks or wood you have added to avoid stirring up the substrate and causing cloudiness. As you add water to the tank, the water will start to overflow into the back filter chamber. Fill until the water level in the back chamber of your BioCube is about 3/4 full.
Step #6 Time to Plug In The Pump![]()
Once there is water in the aquarium, you can plug in the main return pump and start water circulation within the aquarium. However, make sure the cord leading from the pump to the outlet has a drip loop. Drip loops should be installed on every single piece of aquarium equipment to ensure the safety of you and your home. A drip loop is where the cord coming from the pump or other aquarium device first dips down below the level of the outlet and then rises back up to the level of the outlet. The drooping piece of cord ensures that any water that drips down the cord will drip onto the floor rather than enter the outlet where it could lead to an electrical fire.
After the pump is plugged in the aquarium will be cloudy. This should subside after a couple days. You can now move on to programming your aquarium light.
Step #7 Let There Be Light![]()
It is now time to program your BioCube lights. Before you start programming there are a couple things to keep in mind. The lights do not need to come on when the sun comes up. If you’re home in the evenings, then have the lights run when you’re home and not at work. Also, remember that running your lights longer can lead to excessive algae.
A planted aquarium should have a photo period of twelve hours a day (plants in nature experience light close to 12 hours a day throughout the year). However, you do not need intense light for twelve hours. If your aquarium is in a room with ambient light, then running your LED lights six to eight hours a day is adequate. You can run the relatively dim
Channel 3 blue LEDs when the main lights (
Channel 1 &
Channel 2) are turned off.
Start by plugging in the BioCube lights (make sure to include a drip loop in the power cord). Turn the hood on. Just press the
MENU button to cycle through setting the clock, and setting the on and off times for
Channel 1,
Channel 2 and
Channel 3.
Press the
MENU button repeatedly until either the 12H or 24H is displayed on the screen, you can use the up and down arrows to switch between regular and military time. Once you have selected your preference, press
MENU again to set up the clock.
A clock icon should be displayed when setting up the clock. Use the up and down arrows to change the hour. After setting the hour, press
MENU again and then set the minutes. Pressing
MENU again will take you to
Channel 1 (you will see the numeral 1 in the lower left of the screen).
Channel 1 is for the daytime LEDs. We recommend running these lights for four to six hours a day. There should be the word on displayed on the right of the screen. Use the arrows to set the hour. Pressing
MENU again will allow you to set the minutes. Pressing
MENU again will allow you to set the off time for
Channel 1 the same way you set the on time. Pressing
MENU again will take you to
Channel 2, which is for the blue LEDs. We recommend running the blue LEDs run for six to eight hours a day, starting and ending about an hour before and after the white LEDs. You can set the on and off times just as you did with
Channel 1. If your aquarium is in a basement or a room that gets zero ambient light we recommend running
Channel 2 for twelve hours a day.
Pressing
MENU another time will take you to
Channel 3, the lunar light channel. Most people will run the lunar lights either a few hours after the main lights turn off or all night long. You can set the time just as you did for
Channels 1 and
Channel 2. After you program the lunar lights, pressing
MENU will take you back to the time display. At that time you programming is complete.
2. Cycling the AquariumCycling your BioCube Aquarium is a critical step. The process of cycling is where the natural bio-filter of the aquarium is established. The vast majority of the filtration in a given aquarium is not from the filter but from the living bacteria in the aquarium. The bacteria comes from the air, bodies of the fish, and substrate. This bacteria will break down fish and food waste into less toxic compounds so your fish and plants can live.
Step #1 Add Bacteria and a Food SourceFor the cycling process to start you must first provide a food source for the beneficial bacteria. If you are using a fertilizer enriched substrate such as
Seachem Flourite Clay Substrate then the substrate will have some nutrients in it. While bacteria will naturally come from the substrate and decorations you can speed up bacterial growth by adding
Brightwell Aquatics MicroBacter7.
Step #2 Wait for Nature to Works Its MagicOnce you have added a food source for the bacteria, your aquarium’s ammonia level will rise. Ammonia is toxic to fish, but the nitrifying bacteria in your aquarium will soon proliferate and begin breaking down the ammonia. When the nitrifying bacteria break down ammonia, it produces nitrite. Nitrite is less toxic than ammonia but can still be dangerous to your fish. Another group of nitrifying bacteria will then proliferate and break down the nitrite. The byproduct of nitrite reduction is nitrate. Nitrate is only mildly toxic to fish, yet it’s still undesirable because it can also cause excessive algae growth. In nature, plants or a specialized group of bacteria remove nitrate. In the aquarium either plants or water changes can remove nitrate. Add no fish to the aquarium while the levels of toxic Ammonia, and Nitrite are high.
Step #3 Monitor the CycleDuring the cycling process you will need to monitor the aquarium’s water parameters so you can know where your aquarium is in the cycling process. Testing daily or every other day is sufficient. You should test for ammonia, nitrite, and nitrate each time you test.You can use the
Aquarium Pharmaceuticals Freshwater Master Test Kit.
During cycling you will also need to regularly add top-off water to your BioCube. When water evaporates only the water leaves the aquarium, so you should always top it off with fresh water. As with your original aquarium water, your top-off water should be conditioned with water conditioner or purified with an
RO System. Make sure to fill the tank to the same level it started with. Once your test results show there is no more ammonia and nitrite in the water, the cycle is complete and you can begin preparing to add fish. The entire cycle process usually takes 3-5 days.
Step #4 Preparing for FishWhen you finish cycling you will need to perform your first water change. The water change will help to remove the nitrate left over from cycling your tank. About 1/3 of the tank water should be changed initially. This amounts to about one 5-gallon bucket for the BioCube 16 and two buckets for the BioCube 32. Make sure to prepare your water ahead of time just as you did when you initially filled the aquarium.
Before removing the dirty water you should clean the algae off the glass of the aquarium with a
Coralife BioCube Algae Cleaning Magnet or an algae pad such as a
Seachem Duo Algae Pad. Then you can remove water from the aquarium by using an
Aqueon Aquarium Water Changer or
Python No Spill Clean & Fill gravel vac. Unplug the main return pump and then place the gravel vac in the aquarium. Gently suck on the hose end of the gravel vac to start the siphon and then place the hose end in a bucket. Gently push the gravel vac into the substrate removing as much waste as possible. Once you have removed the dirty water from the aquarium, you can pour the new water you prepared into the aquarium and turn on the main return pump. At this point you should do your first cartridge replacement. You should replace the cartridge before you add fish so that your filtration is functioning optimally. Rinse the new filter cartridge just as you did with your original cartridge.
3. Adding FishAdding livestock is the most exciting part of setting up your BioCube Aquarium. Here are some basic guidelines that can make it simple.
Adding FishWhen selecting what kind of fish to add to your aquarium, consider the eventual adult size of the fish as well as the temperament of the fish. Fish that grow excessively large or are extremely aggressive should be avoided. You should also avoid fish with difficult dietary needs and other hard to satisfy care needs. Selecting fish should start before you walk into the fish store. Using the internet or an aquarium guide book can direct you to some species that are well suited for your aquarium. A quick list of some suitable kinds of fish include: Tetras, Minnows, Barbs, Danios, Cory Catfish, and Kilifish. Once you have selected what kind of fish you would like to add, you will need to select the individual fish you would like to purchase. When selecting fish make sure to choose fish from clean aquariums with no dead or dying fish. Inspect the fish to ensure it’s free of wounds, blemishes or spots. The fish should be eating, plump, and responsive to stimuli. A skinny fish is prone to disease and is likely being bullied by its tank mates. Ask the employees at your local fish store to feed the fish for you and only buy fish that you see eat. It is also a good idea to use the same food that you saw the fish eat.
After you pick out your fish you will need to take it home and acclimate it to your water. When you are transporting your fish try to keep the fish in a dark temperature controlled environment. Bringing a small cooler along is ideal. While a fish can survive in a bag for long periods of time, you want to minimize the stress on the fish by reducing the amount of time that the fish is in the bag. Try to go straight home after purchasing your fish. Once you have the fish home you can start the acclimation process. Float the fish in the bag on the surface of the aquarium for 15 minutes. This will equalize the temperature between the water in the bag and the water in your aquarium. After the temperature is equal you can open the fish bag and pour the fish with water through a net discarding the water. It is a good practice to never add any water besides your own to your tank since you don’t know what the water contains. Once the fish is in the net you can empty the net into the tank.
Be very careful not to add too many fish too quickly or too many fish in total. No more than three to five fish should be added at a time to the aquarium. Wait at least a week before adding more fish and stop adding fish once the tank becomes too difficult to keep clean or the fish continually fight over territory. For freshwater setups, the BioCube Size 16 Aquariums should have 10 fish (average length 1”) or fewer and BioCube Size 32 Aquariums should have 20 (average length 1”) or fewer fish.
Adding InvertebratesThere are a variety of invertebrates you can add to your BioCube. These include motile invertebrates such as shrimp, snails, and crayfish. You can further categorize these into cleaner invertebrates and ornamental invertebrates. Cleaner invertebrates are much easier to care for and can be added soon after the tank is set up. Cleaner inverts, often called the cleanup crew, tolerate dirty water well and don’t require any specialized feeding. The biggest problem with the clean up crew is they often starve. Because of this, do not add a cleanup crew until there is something to clean. Once you notice algae growth and detritus accumulation you can add a cleanup crew. The most common cleaner inverts are snails and shrimp, especially amano shrimp and nerite snails. Make sure not to add too many cleaners. This can lead to the clean up crew starving and dying. If you are unsure of how many snails or shrimp to add, then remember that you can always add more down the road if there are still algae and detritus to feed them. Snails and shrimp are very hardy, but it is still a best practice to acclimate them in the same manner as you would fish.
Ornamental invertebrates, such as some more delicate shrimp species like crystal shrimp, are more difficult to keep than fish and should be added later once the aquarium is more established. These shrimp can be added in the same manner as fish but keep in mind that many fish will eat shrimp so make sure to pick your fish accordingly. It is common for a BioCube 16 to house 15 or more shrimp and a BioCube 32 to house 30 or more. A final consideration is that smaller shrimp species may get sucked into the BioCube filter. These species are best kept in a specialized aquarium with a specialized filter.
4. Regular MaintenanceTo keep your animals healthy and your tank looking good your, BioCube requires regular maintenance. You need to clean the aquarium, feed the aquarium, supplement the aquarium, and service your equipment. To make sure that you perform regular maintenance it is best to stick to a schedule.
Daily MaintenanceObserve your animals. Make sure that you look at all of your plants, fish, and invertebrates to ensure that they’re all eating and responsive.
Feed your tank. Fish should be fed on a daily basis and some shrimp should also be fed regularly as well.
Clean the glass. It’s best to clean your glass daily. Using an algae magnet like the
Coralife BioCube Algae Cleaning Magnet or the
Flipper Nano Float Aquarium Cleaner will make daily cleaning easy.
Top off the tank. Every day you should check the water level in your BioCube to make sure it’s not too low. Once it has dropped noticeably top off the tank using conditioned water or RO water.
Supplement your tank. Many plant fertilizers are best dosed daily. This is particularly the case with iron fertilizers.
Weekly MaintenanceWater changes. Water changes should happen at least monthly, but many people prefer doing a small water change every week rather than a large water change every month. If you like adding lots of fish and feeding lots of food, then you may have to do weekly water changes.
Test your water. When you first start your tank it is very important that you regularly test your water. Testing weekly can let you know where your tank is in the cycling process and it can also alert you to problems before they get out of control. Once the tank is established you should still test weekly for nitrate, and pH. We recommend using the
API Freshwater Master Test Kit.
Assuming you have cycled your aquarium properly, you should not need to test for ammonia and nitrite. However, if a fish or shrimp dies it may be an indication that you have ammonia or nitrite in the aquarium.
Supplementing your tank weekly with fertilizers is not as good as daily, but it can suffice.
Trimming your aquarium plants can become a weekly activity if you are successfully keeping fast growing plants. You can use Plant Scissors to trim and then remove the trimmed leaves with a net.
Monthly MaintenanceWater changes. If you don’t do weekly water changes, you should do water changes at least once a month. Change at least 1/3 of the tanks volume at least once a month. Doing water changes more often than this can help, but changing more than 50% of the water at once can be stressful on your animals.
Replace your filter cartridge. Replacing your BioCube Filter Cartridge monthly, just as you did before you added fish. A fresh cartridge will be free of debris and have fresh activated carbon to absorb impurities. Clean the top of the aquarium and the light lens. The surfaces of your BioCube will be splashed because of the water movement in the aquarium. Over time this splashing will form hard water deposits. The result is a crusty build-up on the surface of the aquarium. Clean off this buildup with a damp rag. The most important area to clean is the lens cover of your light. When deposits build up on the light cover it will limit the amount of light entering the aquarium and getting to your plants. Cleaning the cover regularly can prevent this.
Add supplements. In aquariums with very few plants monthly fertilizer additions may be all that is needed.
Trim Plants. If you have slower growing plants in your aquarium, they may only require monthly trimming. You can trim the leaves with Plant Scissors and remove the trimmed leaves with a fish net.
Bi-annual MaintenanceClean the main return pump. Cleaning your main return pump will help it last longer and pump more water. Unplug the main return pump to the BioCube and remove it for cleaning. Disassemble the pump by removing the screen cover by pulling it away from the main body of the pump. Then rotate the impeller cover so that the grooves on the side are out from underneath the clamps on the pump body. After you’ve rotated the impeller cover, pull the impeller cover away from the main body of the pump. You can then reach inside the body of the pump and remove the pump’s impeller.
Once you have the pump disassembled you can clean all of the pieces with a tooth brush and then re-assemble the pump. If you have another pump in the aquarium to oxygenate the water, you can use vinegar to remove calcium deposits on your pump (you should always have at least one pump running). Pour some white vinegar in a small container such as a pitcher, lower the pump into the vinegar, and then plug the pump in. Wait for a couple hours, or overnight, and then rinse the pump off in the sink and return it to service.
Clean your light. Beyond regularly cleaning the light cover you should unscrew the light cover and use compressed air to clean dust and debris from the LED panel and the cooling fan. This will help insure that the light is properly ventilated and that the fan is functioning properly.
Clean any other electronic equipment. If you have added any other equipment such as a, circulation pump, or dosing pump, the pumps running these pieces of equipment should also be cleaned. You can clean these pumps in the same way that you cleaned the main return pump. If you have added a heater or chiller, recalibrating it regularly can ensure that it is maintaining the correct temperature.
NOTE ABOUT SUPPLEMENTS:Growing healthy plants will require fertilizers and supplements to build new tissue. There are many plant supplements to choose from. For beginners,we recommend just using
Seachem Flourish and
Seachem Flourish Excel. Many successful planted aquariums will do very well with only these two supplements. Flourish is a comprehensive all-in-one fertilizer and Excel is a carbon source that can help prevent algae. These supplements should be added at least monthly but weekly or daily additions are better because of the increased stability. The amount dosed is based solely on the amount of plants in the aquarium with more plants requiring more fertilizer.
If your test results show there is no detectable nitrate in the water, you will definitely need to add fertilizer. Likewise, if you have an excessive amount of nitrate you should stop dosing with fertilizer.
5. Upgrading Your BioCubeAs your aquarium matures, and as you become more experienced, you will want to find ways to improve your BioCube. You can upgrade your tank’s filtration, add CO2, add temperature control devices, and utilize automation. These upgrades will reduce maintenance and increase the functionality of your aquarium so that you can keep more delicate animals with less work.
Upgrading FiltrationWhen you receive your BioCube the back filtration area is intentionally left empty. This is so that you can customize the filtration to your liking. The simplest way to boost your filtration is to add some chemical filter media to the trays in the center chamber of the filtration area. The most common filtration media is activated carbon. Carbon will help to improve water clarity, reduce odors, remove heavy metals, and remove dissolved organic compounds. We recommend using the
Inland Seas 6 oz Activated Carbon for the BioCube 32 and
Inland Seas 3 oz Activated Carbon for the BioCube 16.
Another option is to add a form of resin filtration. Popular resins include
Seachem Purigen,
Poly-Bio-Marine Poly Filter Pads, and
Chemi-Pure Green. Resins last longer than carbon and can remove compounds carbon can’t, such as ammonia, nitrite, and nitrate. Resins are also better than carbon at removing heavy metals.
There are multiple trays in the back chamber of the BioCube Aquariums, so using more than one of these filter medias is possible.
A second way to upgrade the filtration is to add a UV Sterilizer. UV sterilizers are designed to kill everything in the water column with UV light. UV sterilizers are primarily used to kill algae, bacteria and parasites in the water. In planted aquariums green water from algae is common and a UV sterilizer will remove this. UVs can also reduce fish disease and stop the white cloudiness from bacterial blooms. We recommend the
Coralife BioCube Sterilizer which is designed to fit between the return pump and water output of the BioCube 16 and 32.
Upgrading Temperature ControlMany people will not need to add a chiller or heater to their freshwater aquarium. Any temperature between 76 and 80 is acceptable for a planted aquarium, and many aquariums will naturally stay in this range without any additional effort. However, if your home temperature is in the low 70s or mid 80s then you will need to look into ways of chilling or heating your BioCube.
Heating the aquarium is much easier than chilling it. Adding a simple and affordable aquarium heater such as an
OASE Heat Up Heater or
Lifegard Quartz Heater will ensure that you aquarium stays warm enough. The BioCube 32 can accommodate a 100 watt heater (
OASE HeatUp 100 Watt Heater), and the BioCube 16 and BioCube 14 only need a 50 watt heater (
OASE HeatUp 50 Watt Heater). The heater is usually placed in either the first or third chamber of the BioCube. If you decide to place a heater in the third chamber, you will need to raise the water level in the third chamber so the heater stays submerged.
Aquarium chillers are far more expensive than aquarium heaters. Fortunately, the new LED BioCubes run much cooler than the older fluorescent BioCubes, which sometimes had heat issues. Despite using LEDS, if your aquarium is in a hot room a chiller may still be necessary. Before adding a chiller, try adding a fan to stop heat from building up inside the aquarium. The Zoo Med Aqua Cool Aquarium Cooling Fan can be inserted through one of the back openings in the canopy of either the BioCube 16 or BioCube 32. The fan alone can drop the temperature 3-4 degrees. Adding a nano chiller such as a
JBJ 1/15HP Mini-Arctica Aquarium Chiller will insure that your aquarium stays cool enough. Chillers must be plumbed inline, making their installation a little difficult. The most common way to install a chiller is to use the main return pump to pump water out of the aquarium, and through the chiller, and then pump back from the chiller to the outlet inside the aquarium. Because of the extra work required for the pump to push water through the chiller, it’s a good idea to upgrade your pump when adding a chiller.
Upgrading CO2All plants use CO2 to grow. Photosynthesis works by using light energy to turn water and CO2 into sugar, and since there is not much CO2 dissolved in the water CO2 can be a limiting factor for plant growth. The simplest way to add CO2 to your BioCube is with an
Ista Disposable CO2 Set. To use, place the CO2 Set Diffuser in the first chamber of the BioCube, and then press the button on the top of the CO2 container to add CO2 to the diffuser. The CO2 in the diffuser will slowly dissolve away over time. Generally, CO2 will need to be added about once a day.
For more info see our
Ista CO2 Diffuser Set Video.
For more advanced CO2 set ups you can use the
Ista Premium CO2 Set. Just like with the basic kit, you will place the CO2 diffuser in the first chamber and store the canister in the stand. With the Premium Set you might only need to replace your cartridge once per month.
Upgrading AutomationAdding automation to your aquarium can help you do less aquarium maintenance. It’s also an excellent way to maintain your aquarium when you’re out of town.
The most common automation addition is an automatic top off unit, or
ATO. An ATO will keep the water level in your aquarium consistent.
There are a variety of ATOs to choose from. An excellent choice is the
IceCap ATO EZ System. This ATO is affordable, reliable, and has small, discrete sensors that fit into the third chamber of the BioCube. To install the ATO, connect the sensors and pump to the control unit. Use the magnet to place the sensors right at the water level in the third chamber. Place the pump in a container of fresh water and rout the pump’s hose back up to the aquarium and turn on the unit. The ATO will then maintain the tank’s water level at the point where you placed the sensors. Just make sure to fill the reservoir with RO water when necessary. With a five gallon reservoir you could have enough top off water for a couple weeks.
One of the most common concerns people have when going out of town is feeding the fish. You can always have a friend or neighbor feed your fish, but often these helpers will overfeed the fish, leading to a dirty aquarium. An
automatic feeder such as the
Hydor Automatic Feeder For Aquariums will feed your fish a consistent amount of dry food on a daily basis. Feeders are also needed if you have a tank at work and you can’t feed your fish on the weekend. To use an auto feeder, fill the drum on the auto feeder with your choice of dry food. Then program the feeder according to the manual and test the feeder by having the feeder dump some food on to your hand. You can adjust the amount of food by opening or closing the door on the auto feeder.
If you’re only gone for a short period of time, you can have the feeding door open at the top of the aquarium hood. For a more permanent solution you can cut a small hole in the canopy and set the auto feeder above the opening.
The last piece of automation to consider is a dosing pump. Dosing Pumps automatically add liquid additives on a pre-scheduled basis. Healthy planted aquariums require fertilizer additions and these additions are best added daily. Using a dosing pump to automate this task can save you time and ensure the additions are done consistently and regularly. We recommend using the
CoralVue Hydros Sole Dosing Pump. The controller is suitable for both saltwater and freshwater aquariums and can be used independently or in conjunction with other HYDROS devices. The Sole can send alerts and notifications, and when used with a
Hydros XP8 or
Hydros WiFi Power Strip, it can also control outlets for lights, pumps, feeders, and other aquarium accessories.
6. Common BioCube ProblemsAlgaeBy far the most common problem all aquarists experience is unwanted algae. Algae is inevitable in an aquarium, but it can be managed. The first thing to consider when you see algae is that some algae is normal and unavoidable. Even the most skilled aquarists have algae in their tanks. Needing to clean the glass of a light algae film weekly is normal. Algae blooms within the first 3-6 months of setting up a new tank are normal. After about six months, when a tank has become established, if algae begins to cover rocks, sand, and plants, then you have a true problem that needs to be addressed.
The first thing to do when experiencing an algae problem is to understand that algae doesn’t come from nowhere. Algae is growing in response to ideal algae growing conditions in the form of light, and nutrients, and improper CO2 levels. Most algae problems in planted aquariums are due to an imbalance of these three levels.
Of these three levels the easiest one to balance is the aquariums nutrient levels. This is the easiest because an aquarium’s nitrate level is a great indicator of the overall nutrients in the aquarium. Plants need nitrogen from nitrate but too much nitrate can fuel algae growth. When you are experiencing an algae problem, start by testing for nitrate. Your target range for nitrate should be between 5-10 ppm. If your test reads out of this range you will need to correct the nutrient imbalance in the aquarium.
To lower the nitrate levels in your aquarium perform water changes. After the water change test the aquarium water again to see if you will need to perform more water changes to get the desired results. Keep in mind that a 50% water change only removes 50% of the water and 50% of the waste, so reducing a nitrate level of 80 ppm to 10 ppm would require three 50% water changes.
To increase the aquarium nutrient levels, add a balanced comprehensive fertilizer such as
Seachem Flourish. Dosing based on nitrate levels is best since nitrogen is the primary ingredient in Flourish. If the nitrate levels start to raise too high, stop or reduce the amount of fertilizer you are dosing.
CO2 imbalances can also cause algae. A CO2 injection system can often reduce algae by providing a CO2 balance that favors your plants over the algae. You can test with an
Ista CO2 indicator to find out if your tank needs more CO2. If the indicator turns yellow, then too much CO2 is being injected and you can reduce the CO2 flow. If the indicator is blue, then you need more CO2. If the indicator is green then your CO2 is just right.
Getting your light levels just right can be difficult because there is not a good measurement of how much light your aquarium should receive. In general, if both nutrients and CO2 are dialed in, and you see both plants and algae growing, you likely have too much light. You can reduce light by reducing the amount of time the lights are on during the day. If nutrients and CO2 have been balanced, and your plants are struggling, they are likely not receiving enough light and you can increase the amount of time the lights are on.
While balancing your light, CO2 and nutrient levels can prevent and slowly kill algae, you can speed up algae removal after an out break by manually removing the algae and adding herbivores.
It is incredibly important when you manually remove algae that you do not simply scrub the algae off of surfaces but also remove the algae you have scrubbed off from the water. If you do not remove the algae from the water, the algae can settle on new surfaces and grow back. Or it can die and then provide nutrients for the remaining algae in the tank. To remove algae from the aquarium turn off all water flow before you scrub algae and immediately perform a water change after scrubbing, directing your siphon to suck out all of the algae you just scrubbed off of the rocks, glass and plants. You can scrub the rocks with a tooth brush. You may find it is easier to target the algae you have scrubbed by removing the gravel vac from your siphon tubing and simply using the tube alone to siphon out the water. You may also want to trim off any plant leaves that are severely covered in algae and remove them.
Biological algae removal comes in the form of the aquarium clean up crew. Animals such as snails, shrimp, and some fish can be excellent algae eaters. Make sure when you add a clean up crew to help solve an algae problem that you do so responsibly. When your tank has a lot of algae a lot of grazers can survive but once the algae is gone they might starve. Because of this either only add a small amount of grazers and rely on manual removal to get rid of most of the algae, or be ready to trade or give away some of your clean up crew once the tank is clean.
If the above treatments still don’t get rid of your algae problem consider using
Seachem Flourish Excel. Excel is a carbon source to help provide carbon to plants in aquariums without CO2 injection, but it also functions as an algaecide. Regularly dosing Flourish Excel as per the instructions can do a lot to kill and prevent algae.
DiseaseFish can get diseases. Before going over how to identify and treat common fish diseases we must state that the best way to avoid sick fish is to only add healthy animals. Make sure to ask your store what they do to prevent disease in their livestock and ensure that there are no obvious signs of disease when you purchase your animals (see the Adding Fish section).
Despite your best efforts at selecting healthy fish and corals, disease can still pop up. Rather than detail every kind of fish and coral disease we will categorize these disease together into groups and show the treatment for each.
External ParasitesExternal parasites include the most common fish disease ich as well as the rarer diseases, neon disease and velvet. These infections look like spots or powder sprinkled on the fish. Luckily there are medications that will reliably eliminate these sicknesses. The formaldehyde based medication
Aquarium Solutions ICH-X will remove these parasites. Unfortunately, this medication is extremely toxic to invertebrates so you will need to remove the sick fish from your tank for treatment if you have shrimp and other invertebrates in your main tank.
BacteriBacterial infections often happen after a fish has been wounded, just as cuts can get infected in humans. Bacterial infections can look like red coloring or swelling around wounds on a fish or cloudy or enlarged eyes known as pop eyes.
Aquarium Pharmaceuticals Melafix is a herbal antibacterial mediation that works well for helping these types of bacterial infections.
Fungal InfectionsFungal infections are common with some fish species including betas. Fungal infections look like a white cotton like build up on a fish’s fins, mouth or body.
Running out of SpaceOf all the problems to have the best one is running out of space. If your coral or fish begin to grow too large for your BioCube you are left with two options—removing some animals or upgrading to a larger tank.
If you decide to keep your BioCube but remove some large fish or plants you can trade fish back to your local fish store or with fellow hobbyists. While removing a fish is an all or nothing proposition, plants can be trimmed back with
Plant Scissors and then bundled with plant anchors for trading.
If you decide to upgrade to a larger tank you have many options. If you like the all in one nature of your BioCube you may want to consider a larger aquarium from
Red Sea. In the medium sized aquariums from these companies the aquariums include filtration built into the back of the aquarium similar to the BioCube. The larger sized aquariums from these companies use sump style filters that sit under the cabinet.
When you decide to upgrade from your BioCube to a new aquarium, it is best if the new aquarium can be in place and ready to fill with water before you move your livestock. When you move your animals from one tank to the other, try to save as much of the original water as possible as this contains beneficial bacteria and will cause less of a shock then if the animals are placed in all new water. You can use all of your existing rock as it'll contains large amounts of beneficial bacteria. You will however want to replace your sand, as sand can build up large amounts of waste over years of being in an aquarium.
Before you transfer your fish to the new tank, put the new tank in place and have it ready to be filled with water. You can add in your new rinsed substrate and any new rock you will need. You can then plant the aquarium with the plants you have transferred while the aquarium is dry. It can help to trim back the plant roots before planting because the roots will quickly re-grow into the new substrate. If the new aquarium is only slightly larger, you can start adding water from your old tank to the aquarium and then add all of the fish. You will not be able to completely fill the whole tank with your existing water, since the new tank is larger, so have some water prepared to make up the difference once the animals are transferred. Add the water at the end. If your new tank is substantially larger, you may need to start with some water in the tank before transferring your animals. Do your best to match the new water’s temperature and pH to that of the old water.
Once the tank is filled you can turn on the new aquariums equipment. When starting a new tank with the rock, plants and liv stock from the old tank, much of the initial cycle is avoided. You may experience a small cycle with some algae blooms, but it will be nowhere near as long as the initial cycle you experienced with your BioCube. Because of this be ready to do more water changes than normal in the first month of the new tank since the tank is more unstable than normal and use
Brightwell’s Microbacter7 to ensure plenty of beneficial bacteria are present to filter the aquarium.
Finally, Enjoy Your BioCube!
Everyone at
MarineAndReef.com wishes you the greatest success with your BioCube. It may seem like a lot of work, but if you follow this guide, and if you’re patient and organized, you will succeed. The Coralife BioCube is both a great way to beautify your home, school or office, and a fulfilling hobby. It’s also a great way for families to connect. If you want your children to understand the ocean, biology, chemistry and mechanics, aquariums are a great teaching tool. Feel free to reach out to us with any questions you may have about your BioCube or other aquariums (toll free 877.878.9349 /
[email protected]).


 Once the aquarium is in place, pull the power cord connected to the main return pump out of the opening in the canopy located directly above the pump. Do not plug the pump in yet. Open the bag containing the BioCube Filter Cartridge and rinse it in your sink with tap water. Place the cartridge on top of the media rack in the middle chamber.
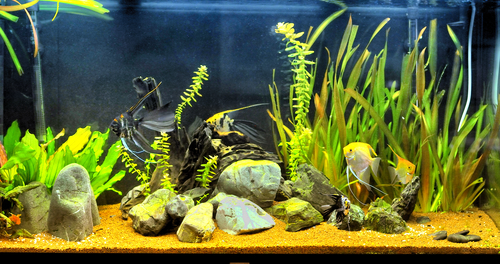 Once you have added your hardscape to the tank you can add your substrate. Adding the substrate after your hardscape will help to anchor your hardscape in place. Live plants do best with a soil like substrate that allows plant roots to easily penetrate the substrate and absorb nutrients. We recommend
 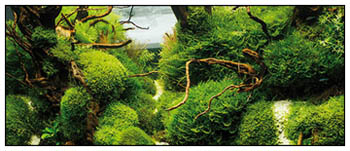 In a planted aquarium it is best to add most of your desired plants right away. With lots of light and a nutrient rich substrate algae will grow quickly if there are no plants using up the nutrients and light energy.
 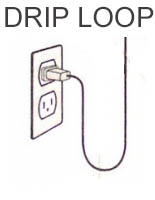 Once there is water in the aquarium, you can plug in the main return pump and start water circulation within the aquarium. However, make sure the cord leading from the pump to the outlet has a drip loop. Drip loops should be installed on every single piece of aquarium equipment to ensure the safety of you and your home. A drip loop is where the cord coming from the pump or other aquarium device first dips down below the level of the outlet and then rises back up to the level of the outlet. The drooping piece of cord ensures that any water that drips down the cord will drip onto the floor rather than enter the outlet where it could lead to an electrical fire.
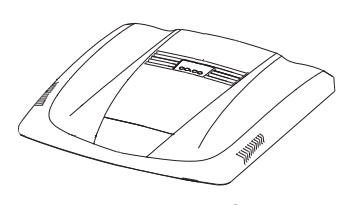 It is now time to program your BioCube lights. Before you start programming there are a couple things to keep in mind. The lights do not need to come on when the sun comes up. If you’re home in the evenings, then have the lights run when you’re home and not at work. Also, remember that running your lights longer can lead to excessive algae.